Move your Legacy Text Messages to an Internal Datasource
The Messages menu in the Legacy UI is being retired. If you used text messages (the Message Board) to drive a Scroll widget, this guide explains how to reproduce them with an Internal Datasource so the scrolling text continues to work in the new UI.
After September 1, 2026, the Messages menu redirects to the new UI, and at the end of 2026 it will be removed completely. You will no longer be able to view or edit your existing messages. To keep using and editing messages, complete the steps below before that date.
Overview
In the Legacy UI, the Scroll widget read its text from the Message Board. In the new UI, the messages are stored in an Internal Datasource (a table), and the Scroll widget reads them from there. A Scheduling column determines when each message is shown, replacing the Message Board's scheduling.
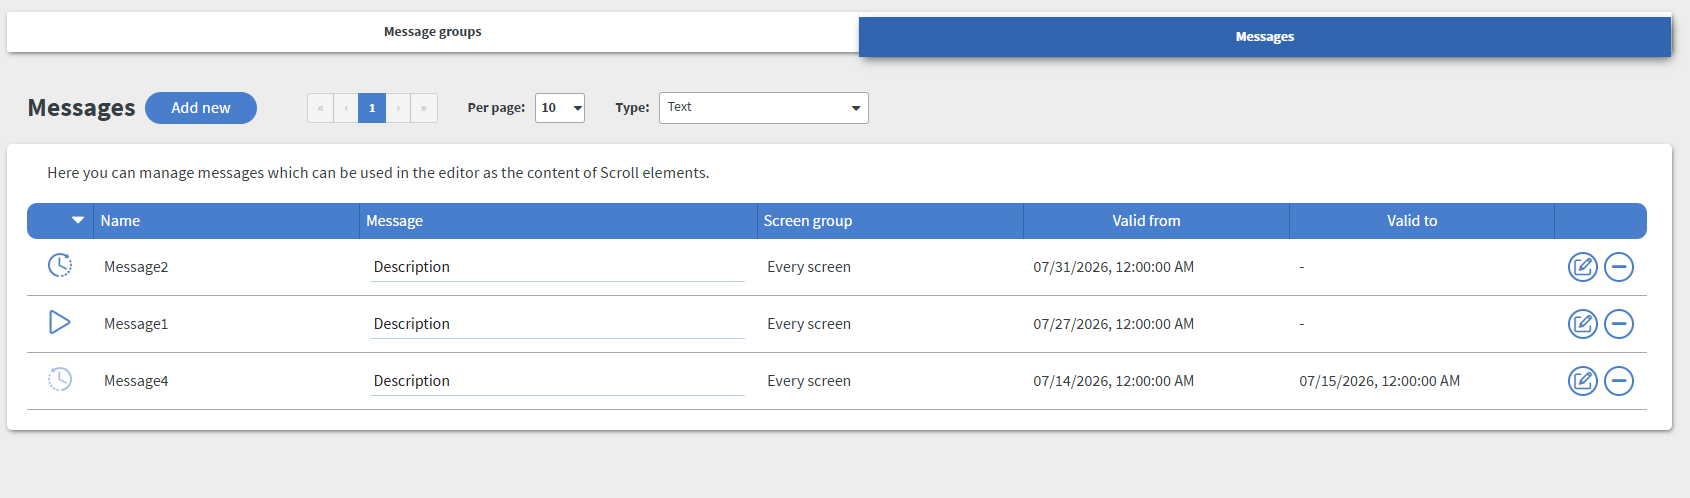
Step 1 — Create the datasource
- Go to Settings › Datasources.
- Click the + button next to the Datasources header.
- Select the Table datasource type.
- Enter a name (for example, Lobby messages).
- Click Save and Open to open the table editor.
Learn more: Internal Table Datasources.
Step 2 — Add the columns
Click + Add column and create two columns:
- Message — type Text. Holds the message text.
- Schedule — type Scheduling. Sets the days and hours each message is shown.
Optionally, add a Number column (for example, Priority) to control the order.
Learn more: Column types.
Step 3 — Add your messages
For each message, click + Add row, enter the text in the Message column, and set its active period in the Schedule column. Leave the schedule always-on for messages without a time limit.
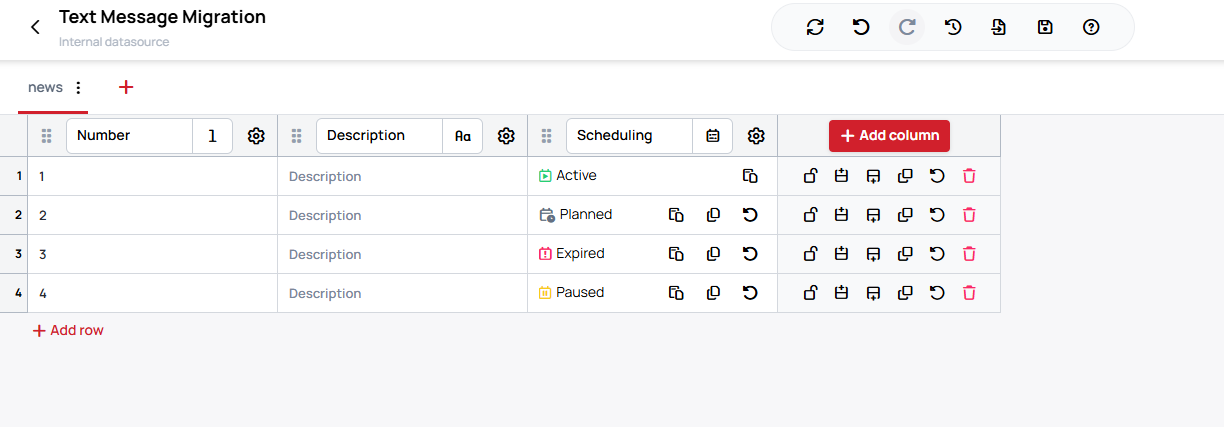
Step 4 — Update the Scroll widget
- Open the content or slide containing the Scroll widget, or add a new one.
- In the widget's Text menu, change Data origin from Message board to Internal datasource.
| Before | After |
|---|---|
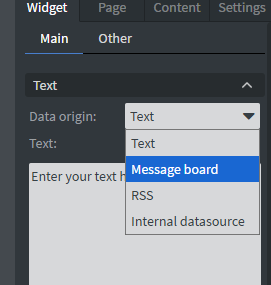 |  |
- Set Internal datasource to the datasource you created.
- Set Schedule column to your Scheduling column.
- Click ADD MESSAGE COLUMN and select the column that holds the message text.
- Save.
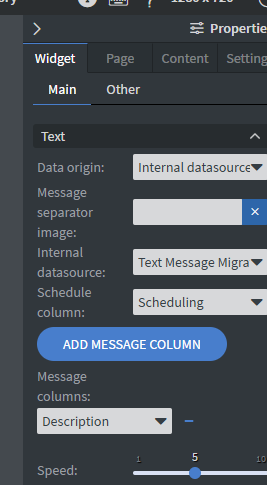
Learn more: Scroll Widget.
Result
The Scroll widget now displays the messages from the datasource. Only messages whose Schedule is currently active are shown, matching the previous behavior. To update messages later, edit the datasource — the content does not need to change.
The Message Board's Only-play timing is replaced by the Scheduling column. If you used message priority for ordering, add a Number column and sort by it.
Messages already connected to a Scroll widget continue to play after the Messages menu is removed, but they can no longer be edited. To change them, recreate them using the steps above.