Create Weather data
Head to the Wallboard main page and select Settings → Datasources. Here, you can create a new datasource by clicking the plus icon. Select "Weather" to access the detailed options.
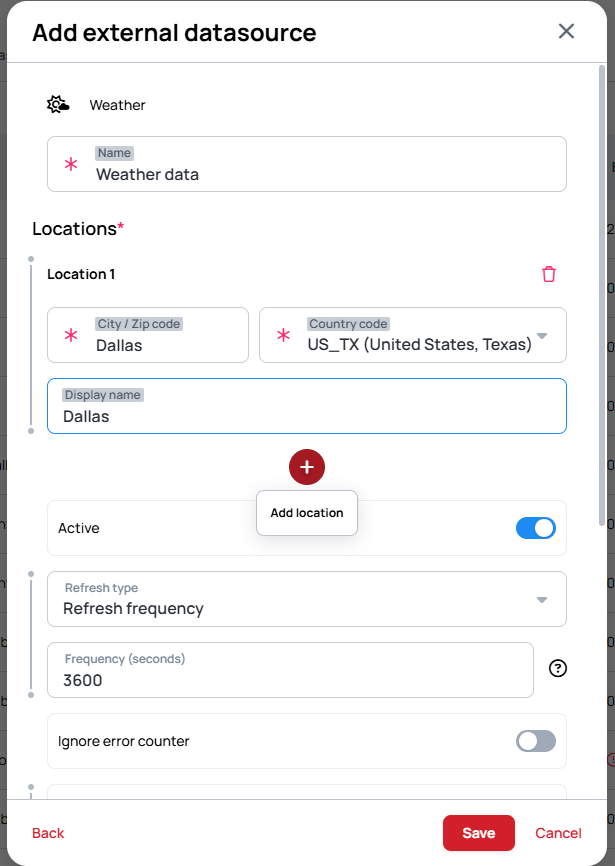
Enter a name for your weather datasource. Then, add locations either by geocode or by entering the city/ZIP code along with the country code (selectable from a list).
You can also define a custom display name if you’d like the city to appear differently than in the original datasource (e.g., München → Munich or Dallas → Dallas, Texas).
You can add as many cities as you'd like. After that, adjust the refresh type and frequency in seconds (default is 3600).
Click Save, and your datasource should look something like this:
{
  "query": {
    "results": {
      "channel": [
        {
          "searchKey": "Moscow_RU",
          "astronomy": {
            "sunrise": "Unknown",
            "sunset": "Unknown"
          },
          "atmosphere": {
            "humidity": "77",
            "visibility": "16.1"
          },
          "description": "",
          "timezone": "Europe/Moscow",
          "item": {
            "pubDate": "Tue Jul 22 10:27:00 GMT 2025",
            "condition": {
              "code": "28",
              "temp": "22",
              "text": "Mostly cloudy"
            },
            "forecast": [
              ...
            ],
            ...,
        }
      ],
        "invalidLocations": [],
        "tryLater": [],
        "unknownError": []
    }
  }
}
Setting up the widget
Datasource bindings
After successfully creating your datasource, place the Weather App Widget and configure the datasource bindings.
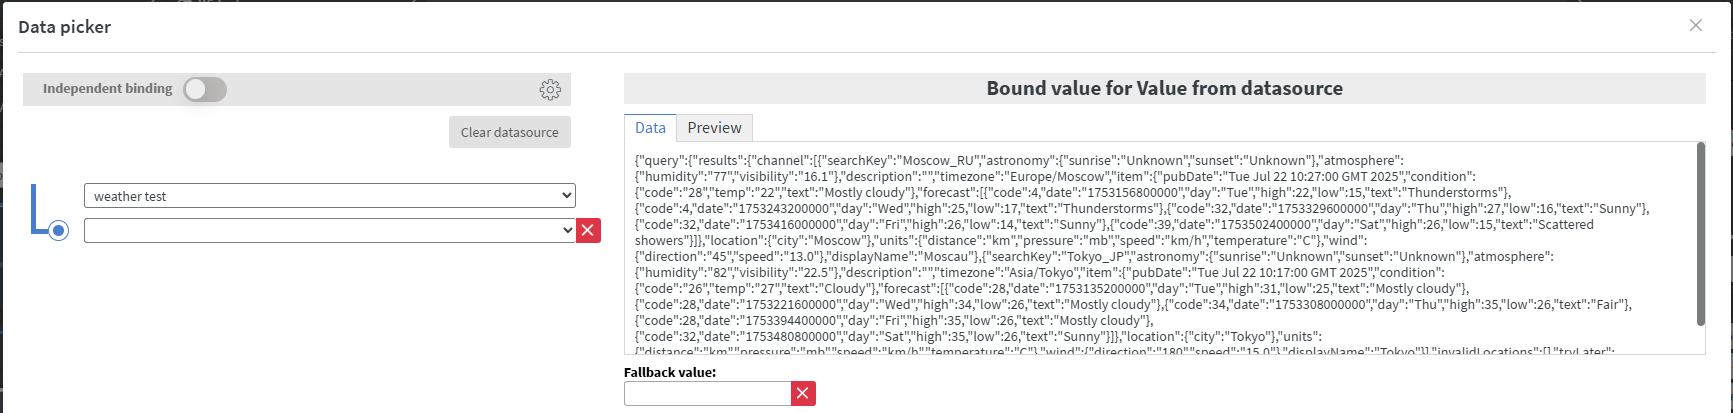
Set Source to "By datasource" under Location Settings. This will make the datasource picker appear.
- Value from datasource:
A correct configuration based on the previous example should look like this:
You can also configure a delay, which controls how long each city's weather is displayed before switching to the next one.
For example, if you set the delay to 5, each city's weather will show for 5 seconds, then switch to the next one for 5 seconds, and so on.
The list loops continuously as long as you're on the same screen.