Creating an SVG Map
Before using the Map application, you need to prepare an SVG file that follows the required structure:
- The SVG must not contain any
transformstyling, as it alters the position coordinates of paths and groups. - The map should be structured with grouped elements, maintaining a strict hierarchy.
For creating the SVG map, we recommend using Inkscape along with the applytransforms plugin. This plugin removes unintended transform styling from the exported SVG file.
Preparing the SVG Map File
Before starting, check the viewBox, width, and height properties on the SVG root. Ensure a minimum size of 1240×720 pixels for both the viewBox and dimensions.
Once verified, create two main groups in your Inkscape document:
Base Group
- Contains the office blueprint, including non-interactive elements like walls and the floor plan.
- Should not include interactive elements like icons, location points, route points, transition points, legends, or locations.
- The ordering within the Base group does not matter, as it is always visible.
Level Groups
For each level (e.g., Level0, Level1, etc.), create the following seven subgroups in the specified order:
- TransitionPoints – Stairs, lifts, or other transition areas between levels.
- LocationPoints – Identifies wayfinding locations.
- RoutePoints – Defines navigation route steps. (More points provide more detailed navigation.)
- Icons – Contains all icons displayed on the map.
- Legends – Contains legend elements and text labels.
- Locations – Represents different office locations.
- Walls – Represents structural elements like windows and doors.
Important: The order and naming of these groups are crucial for correct functionality.
Designing Your Map
Once your structure is set up, you can start designing your map:
- Add locations to the Locations group.
- Insert icons into the Icons group.
- Organize other elements in their respective groups.
Locations
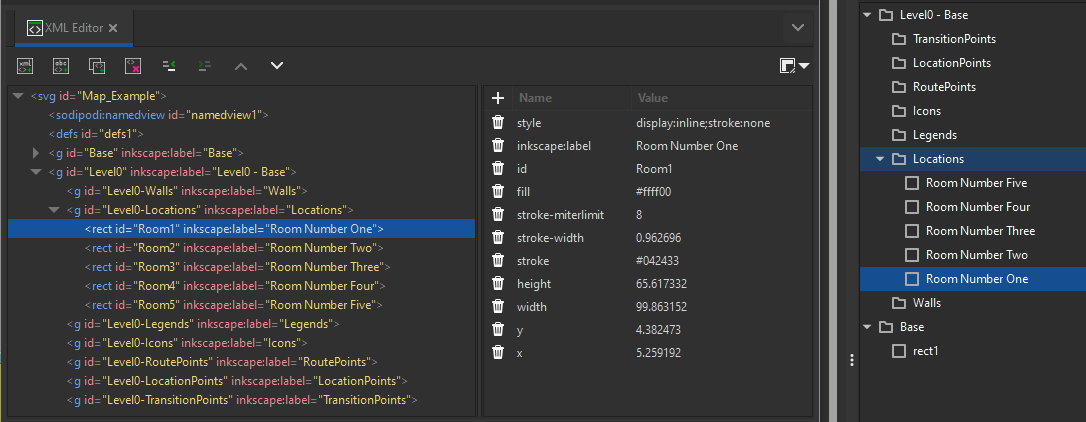
The Locations group can contain various shapes (rect, ellipse, arc, star, etc.). Ensure that every item in this group has a unique identifier. (Manual renaming is optional.)
Example structure and XML Editor view:

Legends
The Legends group can contain text elements and other shapes, but it is recommended to limit it to texts and legends.
Example structure and XML Editor view:

Icons
The Icons group contains images and icons. Ensure each icon/image has a unique identifier since they are used for wayfinding.
Example structure and XML Editor view:
![]()
Walls
The Walls group includes windows and doors, which can be opened or closed.
Example structure and XML Editor view:

Location Points
To enable correct wayfinding, place a location point overlapping each location. Only one location point should be placed per location.
Example structure and XML Editor view:

Transition Points
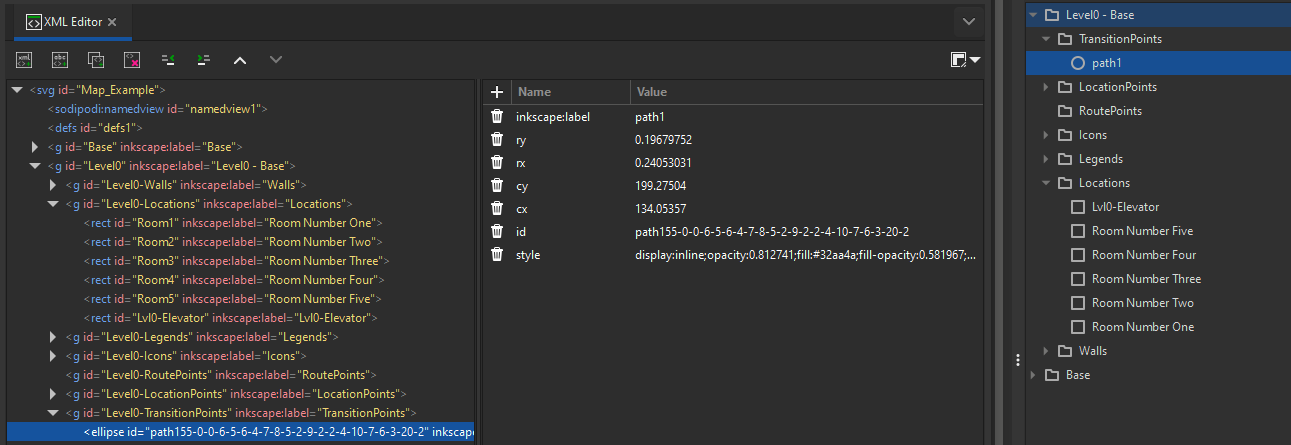
Transition points should overlap with locations. In this example, a transition point overlaps with Lvl0-Elevator. A location should overlap with either a transition or a location point, but not both.
Example structure and XML Editor view:

Route Points
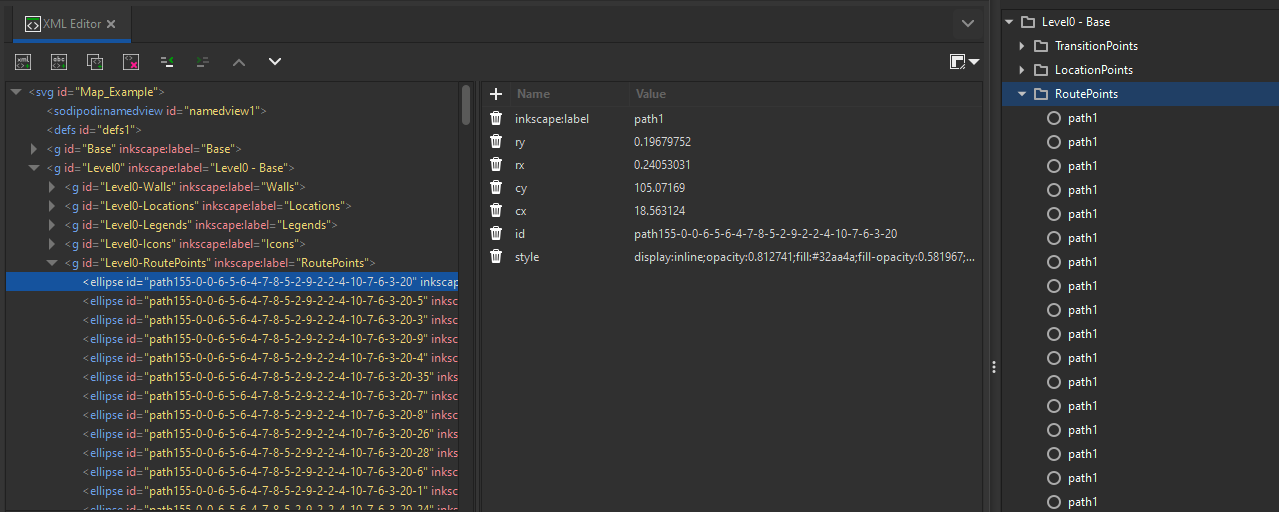
Route points connect transition and location points, defining walkable paths. More route points improve accuracy, but too many can slow down or crash the widget.
Adjust wayfinding sensitivity in the widget settings to optimize performance. For example, a sensitivity of 20 means each point searches within a 20px radius.
Example structure and XML Editor view:

Exporting Your Map
After designing your map, export or save it as an SVG file. Ensure that the exported SVG does not include any transform styling, as this may break the wayfinding functions of the widget.
Once exported, you can proceed with setting up the Map widget.
Examples
-
- Wayfinding sensitivity:
20 - Map ratio:
20 - Default start point:
Start
- Wayfinding sensitivity:
-
- Wayfinding sensitivity:
15 - Map ratio:
64 - Default start point:
Entrance
- Wayfinding sensitivity: