ePaper application usage
How does it work?
The ePaper application differs from our Signage application in a way that it is not always connected to a server, rather it wakes up after sleeping for a set amount of time and re-checks on the server if anything has changed in the assigned content.
-
The amount of sleep time is 10 minutes by default, but it is customizable with the Synchronization Configuration advanced configuration of which more information can be found here.
-
While the ePaper device sleeps, it does not receive updates from the server, which means any content or device settings change will only be applied the next time the device wakes up.
Installation
You can install the ePaper application on your device automatically with Wallboard Toolbox or manually using our guides
- Learn more: Philips ePaper installation guide,
- Learn more: Sharp ePaper installation guide.
First time usage
When the ePaper device is first assigned to a server it will display the 4-digit application code and go back to sleep for 2 minutes by default.
- It will repeat this cycle until it is assigned to a customer on the server and receives its first content.
This behaviour is normal. Wait for 2 minutes until it wakes up and re-checks everything on the server.
Displaying content on an ePaper screen
You can display content onto ePaper devices by simply assigning a slide, content or a playlist to the screen.
- You can do so by entering the device settings then selecting the Assign content option.
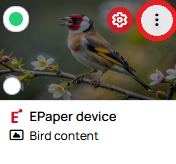
- Also you can click the three dots when hovering a device card in devices then selecting the Assign content option.
- To learn more about contents click here.
There are 2 types of displayable content on ePaper devices.
Using Slides/Contents
EPaper supports slides and contents, but since it’s an ePaper display, it can’t show moving media. Instead, it captures a still snapshot of the whole content which has dynamic elements like GIFs or videos.
To learn more about contents click here.
Using playlists
Playlists can be used to display pictures on the ePaper devices.
When creating playlists for ePaper devices make sure to check the ePaper mode option.
This option will only allow ePaper supported playlist features and file types.
Supported file types: bmp, png, jpg, jpeg, webp, gif Learn more: ePaper mode playlists.
Device management
Updating the ePaper application
The ePaper application updates itself automatically but supports update management where you can set the version limit and when the device can update.
Learn more: Update management.
Wake-up time configuration
Configuration with Page duration
Use the Settings > Device and Page duration (seconds) to set-up wake-up time.
- This method fills out advanced configuration with fixed time automatically.
Configuration with fixed time
Use the Settings > Advanced configuration to set-up wake-up time.
{
  "configuration": [
    {
      "type": "CONFIG_SYNCHRONIZATION",
      "syncPeriodMillis": 86400000
    }
  ]
}
syncPeriodMillisspecifies how long the device will sleep in milliseconds. In this case it is set to 86400000 (1 day).
Configuration with cron expression
Use the Settings > Advanced configuration to set-up wake-up time.
{
  "configuration": [
    {
      "type": "CONFIG_SYNCHRONIZATION",
      "syncPeriodCron": "0 0 12 ? * * *"
    }
  ]
}
syncPeriodCronspecifies a cron expression which tells the device when to wake up. In this case it is set to 12:00:00 pm every day.
If you want to use a different time period use a cron expression generator to get the desired value.
The device will change Content and Playlist pages at every wake-up.
Do not use both syncPeriodMillis and syncPeriodCron in the same configuration, if both are used
then the syncPeriodCron parameter will be used by the application.
Working Hours
Working hours allows you control the operational time of your ePaper device.
Working hours on ePaper devices work the following way:
- First it calculates the next wake up time based on the Page duration
- If it is within the set working hours it will wake up at that time.
- If it is not within the set working hours it will find the very next allowed time and wake up then.
This ensures the device does not wake up at unnecessary times, saving additional energy.
To learn more about working hours click: here.
Power mode
Power mode allows you to set the device's energy saving state:
- Power Off: The device turns off completely and it will use zero energy.
- Sleep: The device goes into deep sleep mode and it will be using minimal energy.
This setting can be set in the advanced config like so:
{
  "type": "POWER_MODE",
  "mode": "POWEROFF" // POWEROFF/SLEEP
}
Offline mode
When the ePaper device cannot connect to the internet or reach the server, it automatically switches to a limited offline mode.
- Each time the device wakes up and successfully communicates with the server, it stores its current state and other relevant information locally.
- If the server becomes unreachable for any reason, the device relies on this stored data to continue operating in offline mode.
- While in offline mode, the device cannot receive new instructions from the server. Instead, it continues functioning based on the most recent information it retrieved.