External Datasources
External data sources are helpful when you want to pull in data from outside platforms—such as Google Sheets or Microsoft Excel. This can be useful for displaying dynamic content like a restaurant menu or a contact list of your colleagues.
Create External Datasource
- Navigate to Settings > Datasources menu
- Select External Datasources
- Click on the button next to the External Datasources header
- Select the Datasource type you wish to use from the list
- Fill the necessary settings fields in the datasource editor
- Each type of data source comes with its own specific set of configuration options
- After you finished the datasource configuration, click on the Save to create the datasource
After saving, your new datasource will appear in the list.
Datasource type selection
Upon creation, the type selector interface displays available data source types for selection.
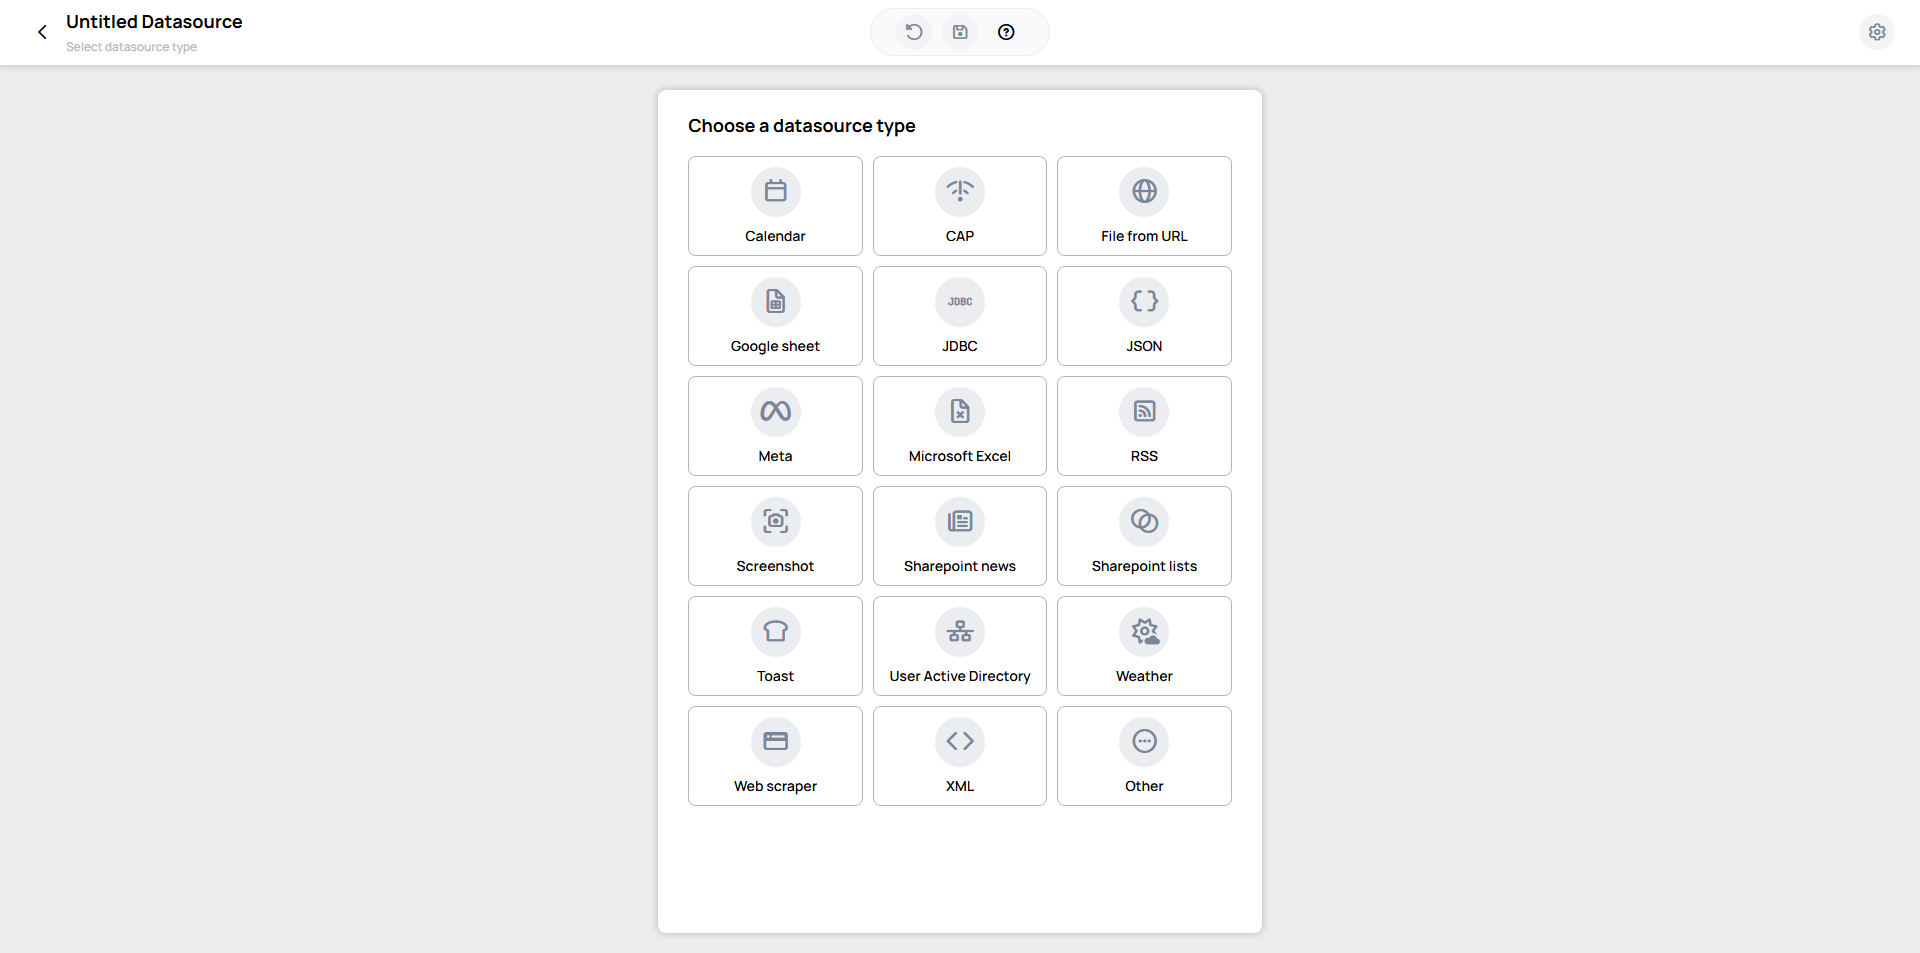
External datasource types
- Amadeus Event
- Calendar
- CAP
- File from URL
- Google Sheet
- JDBC
- JSON
- Meta (Facebook & Instagram)
- Microsoft Excel
- RSS
- Screenshot
- Sharepoint lists
- Toast
- User Active Directory
- Weather
- XML
- Other (Custom integrations)
- Web scraper
- PowerBI
Datasource editor
After selecting the data source type, the full-screen datasource editor opens. It is laid out in three panels: the type-specific settings (left), Advanced settings (middle), and a live Preview (right) that populates once you save.
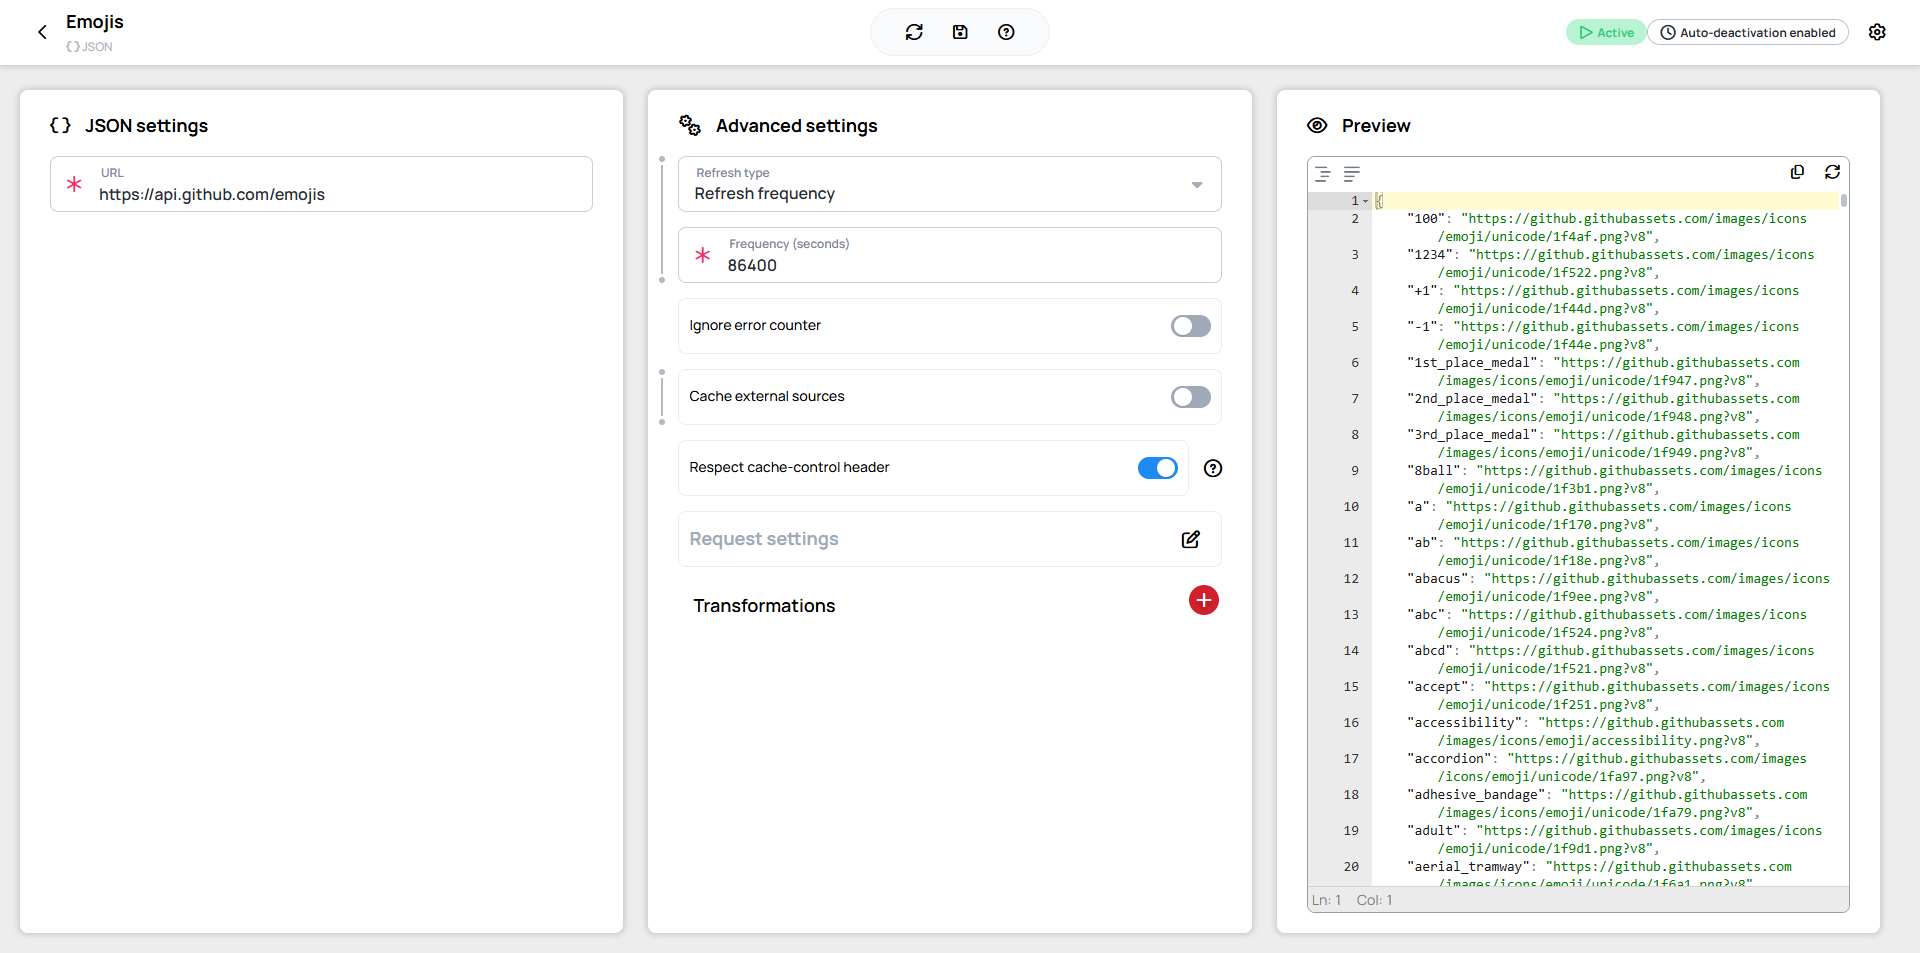
Datasource specific settings
Settings are specific to each data source type and typically include URLs, credentials, and source-specific configuration options.
Advanced settings
These settings are available for most data source types with minor variations and control data source behavior and management rather than source configuration.
Learn more: Advanced Datasource Settings
Preview
Preview data source output as structured JSON with applied query filters.
Header
- Datasource name: Change the datasource's name
- Refresh datasource: Manually refresh the datasource
- Help: A list of hotkeys available
- Status indicators Two indicator types display here:
- Activation status
- Active
- Inactive
- Auto-deactivation
- Auto-deactivation enabled
- Auto-deactivation disabled
- Settings: There are general settings available clicking the icon
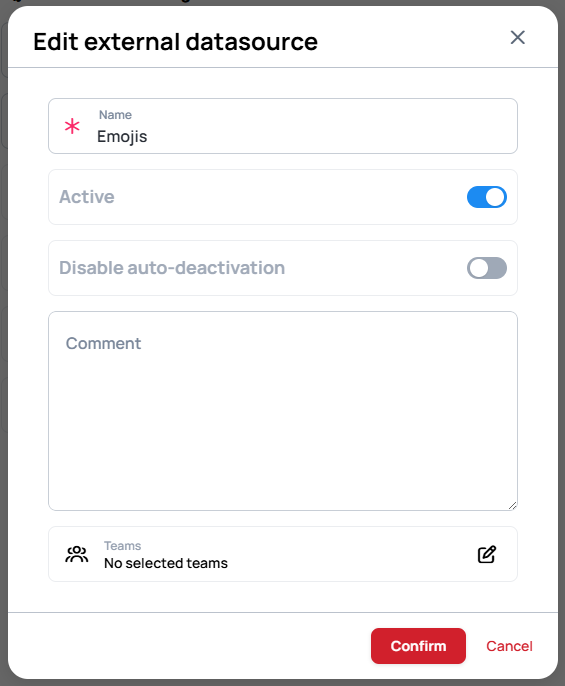
- Name: Change the datasource's name
- Active: Change the activation status
- Prevent auto-deactivation: When enabled, the datasource stays active regardless of inactivity and will not be automatically deactivated after the usage-based threshold. See Advanced Datasource Settings for details.
- Teams: In the Team management modal you can assign teams to manage and see the datasource.
Datasource state
Datasources can exist in several states that indicate whether they are currently in use or not:
- Active: The datasource is currently active and in use
- Inactive: The datasource has been manually deactivated
- Automatically Deactivated: The system has automatically disabled the datasource. This typically happens if the datasource is not used in any content, or if the content it’s linked to hasn’t been displayed on any screen for more than a week
- Navigating to a datasource
- Click on the more button
- Select the Edit option
- Find the icon in the upper right corner of the datasource editor
- Change the Active option
Data Source Auto-Deactivation
Wallboard automatically stops refreshing data sources that aren't in use, preserving performance. All configuration and data are retained — nothing is deleted.
Two Types of Deactivation
| Type | Trigger | Disable With |
|---|---|---|
| Usage-based | 30 days of no device usage | "Prevent auto-deactivation" |
| Error-based | 25 consecutive refresh failures | "Ignore Error counter" |
Both settings are independent — enable both to prevent all auto-deactivation.
What Counts as "In Use"?
A data source is active when all three conditions are met:
- Bound to content (Slide or Playlist)
- That content is assigned to a Channel
- The Channel is playing on at least one online device
Usage-Based Deactivation
| Data Source Type | Deactivation After | Created By |
|---|---|---|
| Standard (JSON, XML, RSS, etc.) | 30 days | Users via Data Sources menu |
| Ad-hoc (Weather, RSS widgets) | Within days | Auto-created via Quick Editor |
Use this for infrequent, seasonal, or critical data sources.
Error-Based Deactivation
Triggers after 25 consecutive refresh failures (unreachable URL, expired credentials, changed data format, etc.). Use this for on-prem services with planned downtime, flaky external APIs, or long-term outages.
- Manually refreshing it
You can also disable error-based deactivation by:
- Click on the more button
- Select the Edit option
- Find the Continue refreshing despite errors toggle in the Refresh settings
- Change the option
Reactivation
- Automatic — happens instantly when content using the data source plays on a device. No action needed.
- Manual — click Refresh, assign content to a device, or open a content preview.
- Manually refreshing it
- Assigning the content that uses it to a device, or by opening a preview of that content
You can also prevent auto-deactivation by:
- Click on the more button
- Select the Edit option
- Find the icon in the upper right corner of the datasource editor
- Enable the Prevent auto-deactivation toggle
Quick Reference
| Topic | Detail |
|---|---|
| Standard data source (usage) | 30 days no usage |
| Ad-hoc data source (usage) | Within days |
| Error-based threshold | 25 consecutive failures |
| Disable usage-based | "Prevent auto-deactivation" |
| Disable error-based | "Ignore Error counter" |
| Data preserved? | Yes |
| User notified? | No |
| Cron vs interval schedule impact | None (deactivation is usage-based, not schedule-based) |
Internal data sources are not affected — they have no automatic refresh mechanism.