Standard Installation on Android
Download the Application
Before downloading our Android client's installer please make sure you visit About our Android Client page's Android requirements section and ensure you have the necessary prerequisites for the installation.
Download from 1.x UI
- You can download the latest version of our Android Client from the editor interface, from
Settingstab by selecting theDownloadmenu and then selecting the installer file
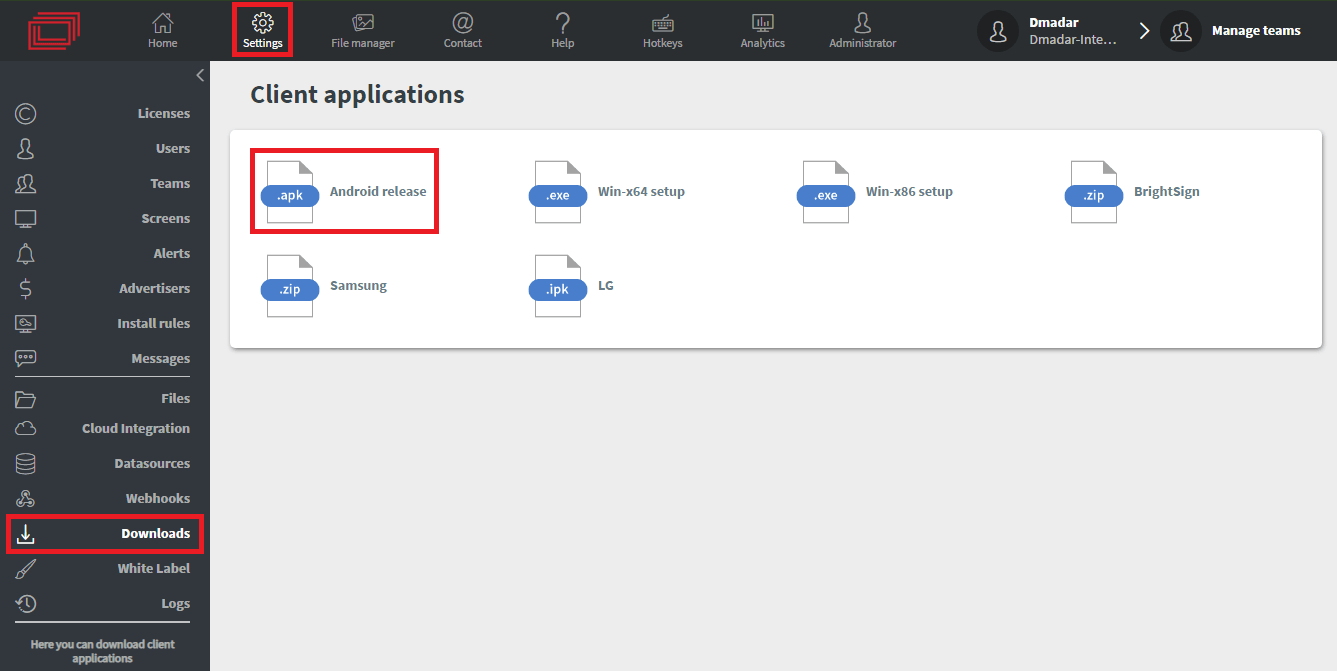
Download from 2.0 UI
Navigate yourself to Settings menu, select the Downloads
- Here you can find all the latest version of downloadable client application installer.
- You can download it by selecting the target platform.
Other
- You can also download the latest version of the application from
https://example.domain.com/api/storage/update/MSD-Wallboard-Client-release.apk - If you require a specific version you can achieve that by
https://example.domain.com/api/storage/update/android/com.msd.wallboard.client/default/version number/MSD-Wallboard-Client-release.apk
Basic Installation Steps
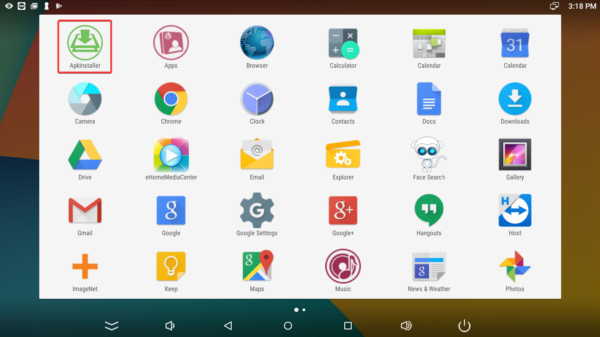
Copy the .apk file to a Fat-32 formatted flash drive and install it on the device via the Apk Installer application found under All Apps.
Appearance of menus may differ depending on the media player that you are using.
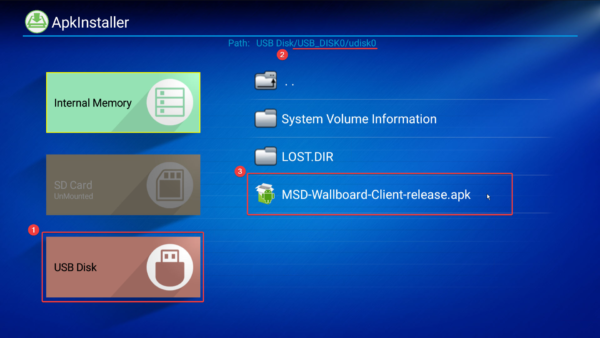
Once you are in the Apk Installer, select your USB drive and navigate to the folder path that contains the Wallboard application that you installed.
Now click on the file and click Next until you have finished installing Wallboard.
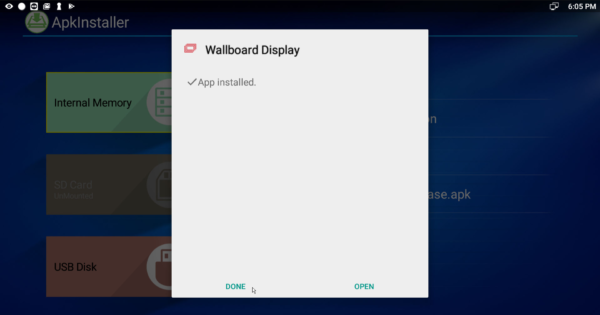
Start our client application and set the server URL if that needs to be changed.
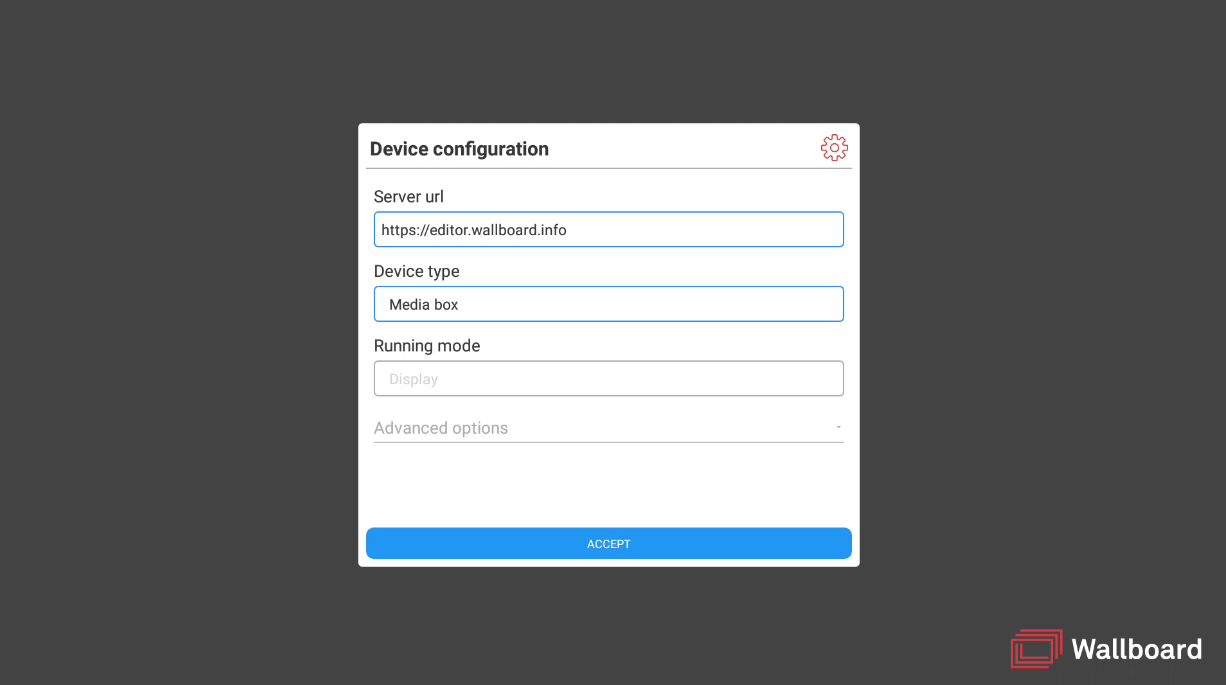
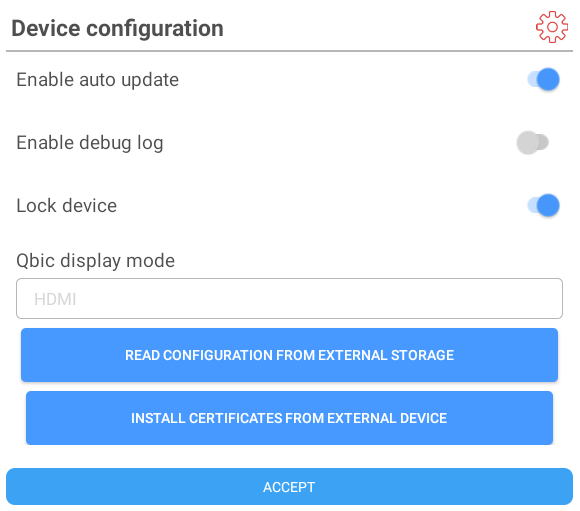
If you open the Advanced options, you will see some additional settings for the application.
- Enable auto update: This allows the application to update itself when the next reboot occurs if it already found a new available update. Only works on Rooted devices.
- Enable debug log: This allows the application to store a more detailed log.
- Lock device: Disables default unused system applications and makes Wallboard application a system app.
- For more information about Locking android device visit the following article: Locking Android device
- Qbic display mode: This function determine how Qbic devices will react to Display On/Off commands. If you set HDMI, the application will stop the HDMI source of the device. If you set CEC, the application will turn on/off the CEC capable screens.
- Read configuration from external storage: Skips manual configuration by using configuration file from external device. For more information: Read configuration from external device
- Install certificates from external device: Installs certificates from connected external devices from this path: wallboard/certificates/ (Example: wallboard/certificates/custom_certificate.pem). Supported certificate formats: .pem, .crt, .cer.
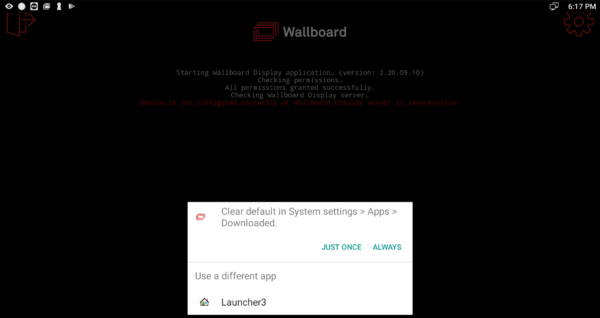
If you do not want your device to be locked down you can set the Wallboard app as the Home app.
Every time the device turns on the Wallboard application will be started automatically instead of the Android home, or home selector.
Alternative Installation Methods
- Use the Default File Manager:
- Open the File Manager app on the device.
- Navigate to the USB drive where the APK is stored.
- Tap the APK file and select Install (enable "Unknown Sources" if prompted).
- Install from a Browser:
- Open the device’s web browser and enter the direct APK download link:
https://example.domain.com/api/storage/update/MSD-Wallboard-Client-release.apk - Download and install the APK from the browser.
- Open the device’s web browser and enter the direct APK download link:
If the device does not allow APK installations, it might have system restrictions (e.g., enterprise-managed devices or custom firmware). In that case, contact the device provider or IT administrator.
After the installation is complete you can register your screen in the editor interface with the four-digit code displayed on the screen.
For more information about registering a device visit the following article: Device registration
Video tutorial for installing Wallboard on Android: https://www.youtube.com/watch?v=j40KNCDoWxA