Stopper widgets synced through internal datasource
Steps
Add a stopper widget and set up its style, start from, direction, stop at (if you need it), etc

- We will also need some kind of action to interact with it.
- These could be tied to sensor events, etc.
- In this example, we will use touch events.
Add buttons and actions
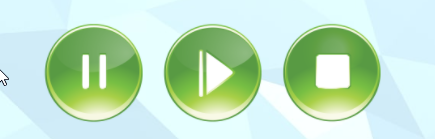
- Add some buttons, for example, image widgets.
- Use the “Edit touch events” on the other tab or press Ctrl+Shift+E to open the touch events dialog.
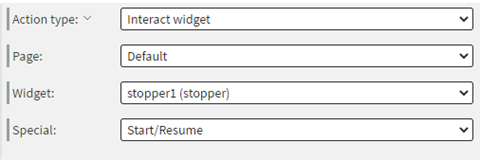
- Add the corresponding
Interact widgetaction to each of them, targeting the stopper widget with “Start/Resume” “Pause” and “Stop” or “(Re)start”.
Test if all these work in the preview.
Resume starts from where it is, Pause stops at where it is, Stop goes back to the start time and (Re)start starts from the start time.
Edit stopper events
Now click the Edit stopper events on the stopper widget’s Other tab.

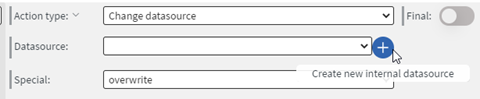
Add a new action and select Change datasource for action type. We can create the internal datasource right here with the plus button.
Now we need to click the Create webhook and Create API key buttons.
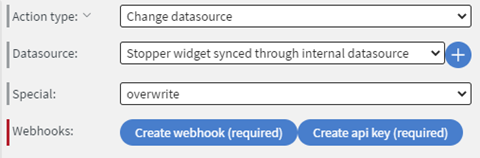
If both of these were successful, the buttons will be replaced by this text:
![]()
Now set Value origin to Property of received value and type “config” as the Property name. This is what you should see:
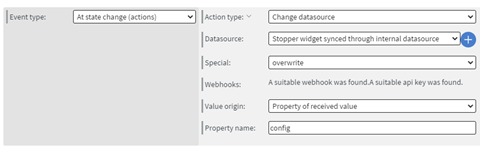
Also, set the event type to “At state change (actions)”. It needs to be set to this to capture all the related events but not send too many unnecessary notifications.
Start the stopper in preview
Now open the content in the preview and start the stopper at least once. It’s important to set up the datasource with the data.
Bind to data - config
After that, we can bind any stopper widget to this data. Go to the Other tab and click the “Bind anything” button or alternatively use Ctrl + Shift + double click. Let’s start by binding this same stopper widget to this data. Select the Config object (for sync) option in the bind anything window.


We only need to select the datasource itself. If we used “overwrite property of data” instead of “overwrite” in the change datasource action, we would need to select that level. You know you have the correct level when the Data in the picker preview looks similar to this:
![]()
Now if you open this in the preview again, it will be at the state you last left it. If it was counting, it will display the time spent since you last started it. If it was paused, it will be paused at that same second, etc. For any other stoppers you need to follow this one, only do the “Bind anything” step.
While using this, make sure you are only directly interacting with one of the widgets to assure it works as intended. Best is to use a different content for the “master” stopper and the “following” stoppers.
Alternatively, you could create your own external application that writes the config object into an internal datasource (via a webhook) and make all your stopper widgets follow it, just bind them to this datasource instead.
Config structure:
{
  "config":{
    "direction":"countDown",
    "hasStopAt":true,
    "msFromPlayToPause":0,
    "startFrom":{
      "hour":0,
      "min":13,
      "sec":0,
      "dateTime":"2023-01-31T23:00:00.000Z",
      "time":"2023-02-01T00:00:00.000Z"
    },
    "startTimestamp":1622706857667,
    "state":"started",
    "stopAt":{
      "hour":0,
      "min":0,
      "sec":0
    }
  }
}
Result
State can be: ‘started’ ‘stopped’ or ‘paused’. MsFromPlayToPause is only needed when ‘paused’. Stop at is only needed when ’hasStopAt’ is true.
Direction can be
- ‘countDown’
- ‘countUp’
- ’countDownToDate’
- ’countUpFromDate’