Payment
This article introduces you to our custom Payment app and its core features.
The Payment app is deployed to customer servers per request. To learn more contact our support at sales@wallboard.info!
This custom app is under active development and any information in this documentation could be inaccurate or outdated! If you have any questions please contact our support at support@wallboard.info
What is the Payment app?
The Payment App allows you to process real (or sandbox) payments using the following supported payment methods:
- Stripe
- Paypal
- Revolut
- Wallboard payment (for custom requests)
The Payment App functions exclusively with the Checkout app.
Prerequisites
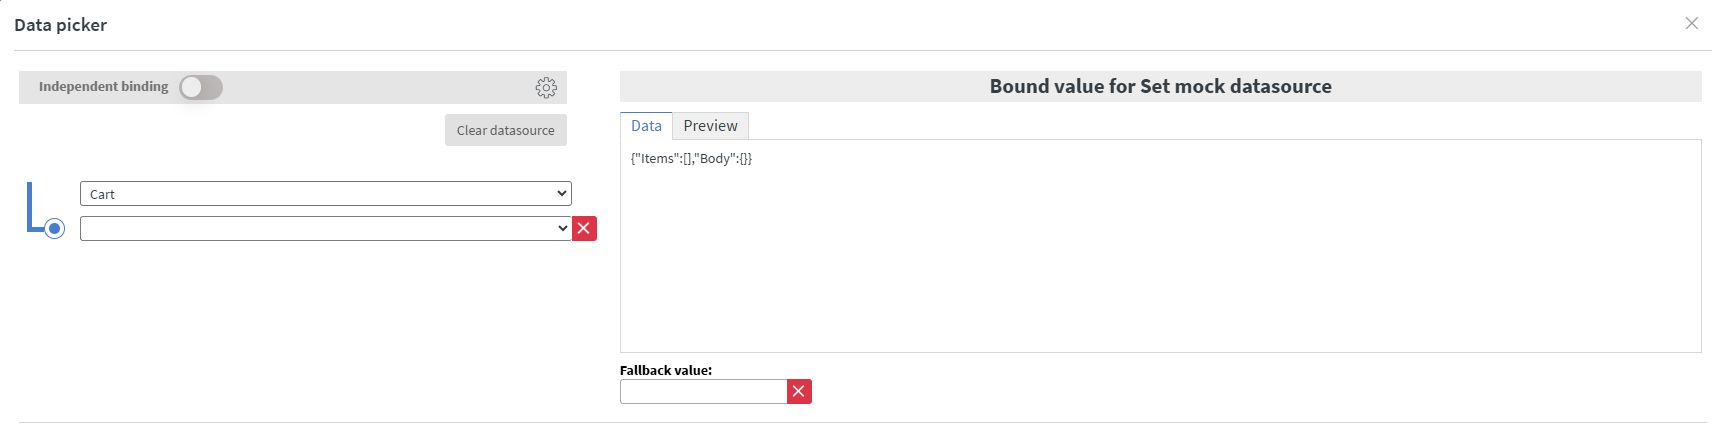
To process payments successfully, you must set up the same mock datasource used by the Checkout app app uses.
Setting Up the Widget
Datasource bindings
Once you have created your mock datasource, you can add the Payment App widget and configure its datasource binding. Ensure that you select the same mock datasource used by your MenuBoard and Checkout datasets.
Widget initialization
- Revolut
- Paypal
- Stripe
- Wallboard Payment
For Revolut, you need to enter a Bearer token.
Learn more here.
For PayPal, you need to enter a Client ID and Secret key.
Learn more here.
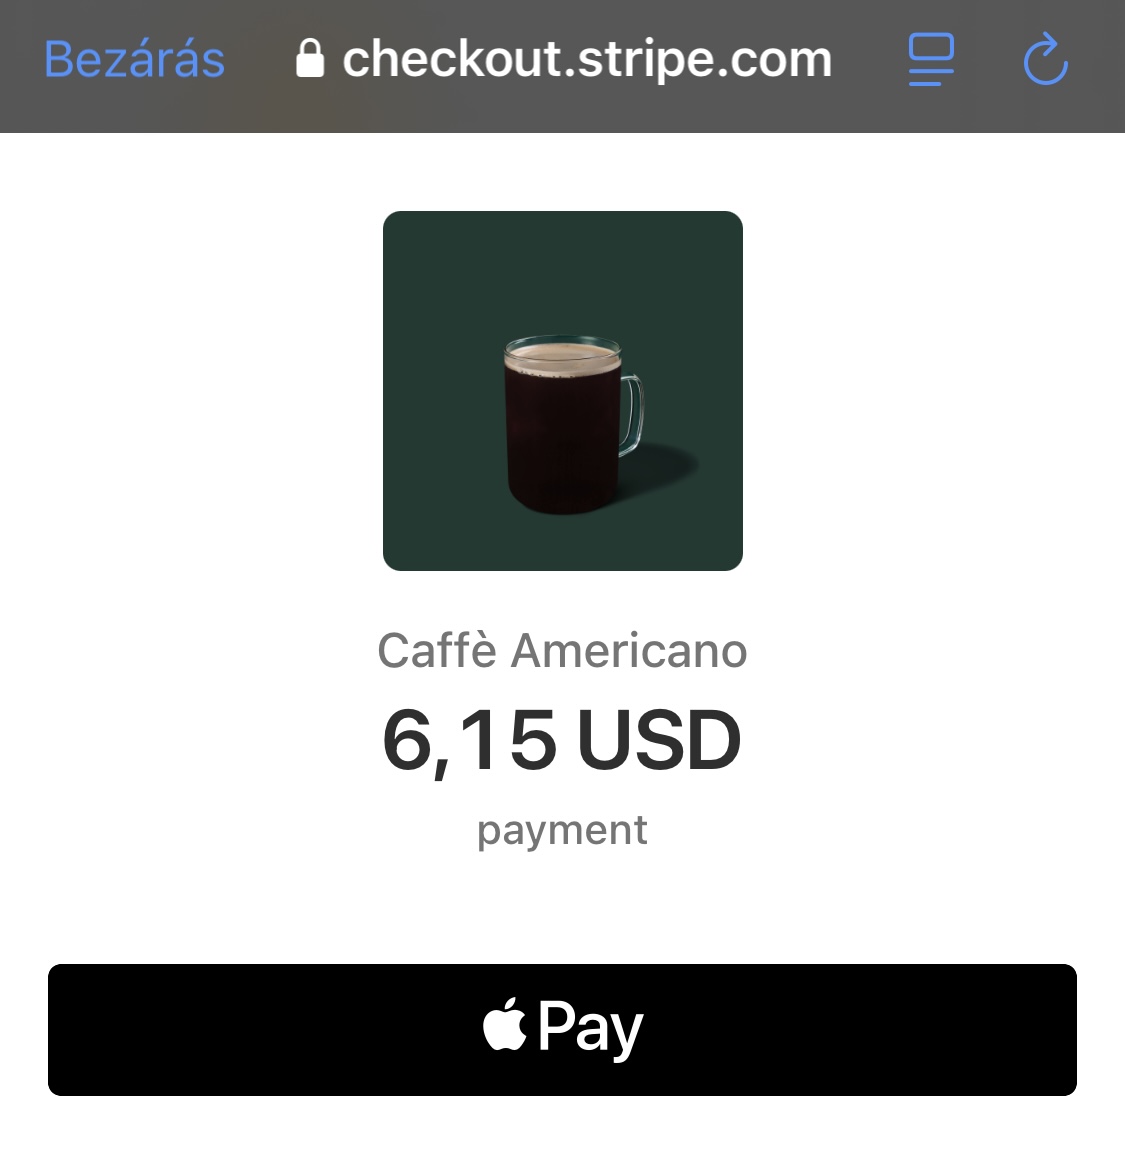
For Stripe, you need to enter a Publishable key and Secret key.
Learn more here.
Wallboard Payment is deployed to customer servers per request. To learn more contact our support at sales@wallboard.info!
Generic Settings
In this section, you can configure the basic appearance and behavior of your widget.
You can:
- Select a logo to display.
- Choose a font family, font size, and apply styles such as bold, italic, or underline for all text within the widget.
- Add and resize the Success state and Failed State images.
- Set the QR code size.
Behaviour settings:
- Countdown seconds: Set the time limit for customers to complete their payment.
- Inactivity seconds: Define the inactivity duration. If the widget remains untouched beyond this limit, it triggers a sensor event:
inactivityReturnPage, true - Enable missing text: Displays a message to inform customers when the cart is empty or if the payment data is invalid.
sensor events
The widget automatically sends sensor events based on user actions:
successReturnPage- Triggered when a payment is successful.failedReturnPage- Triggered when an error occurs (e.g., API endpoint unreachable, invalid or missing payment data).inactivityReturnPage- Triggered when the widget remains untouched for the set inactivity duration.
Text Settings
In this section, you can define all the text displayed by the widget. This allows for flexibility in supporting multiple languages and makes customization easy.
Failed attempt button settings
These settings allow you to customize the appearance of buttons that appear when:
The inactivity timer reaches its limit.
A payment fails due to an error.
Basic Functionality
The Payment widget attempts to start the transaction immediately upon loading. For a seamless experience, it is recommended to place the widget on a new page.
How It Works:
- The Checkout App sends the selected items to the mock datasource when a touch event (
Checkout) is triggered. - After a short delay (0.1 seconds is sufficient, but longer delays are also acceptable), the new page loads the Payment widget.
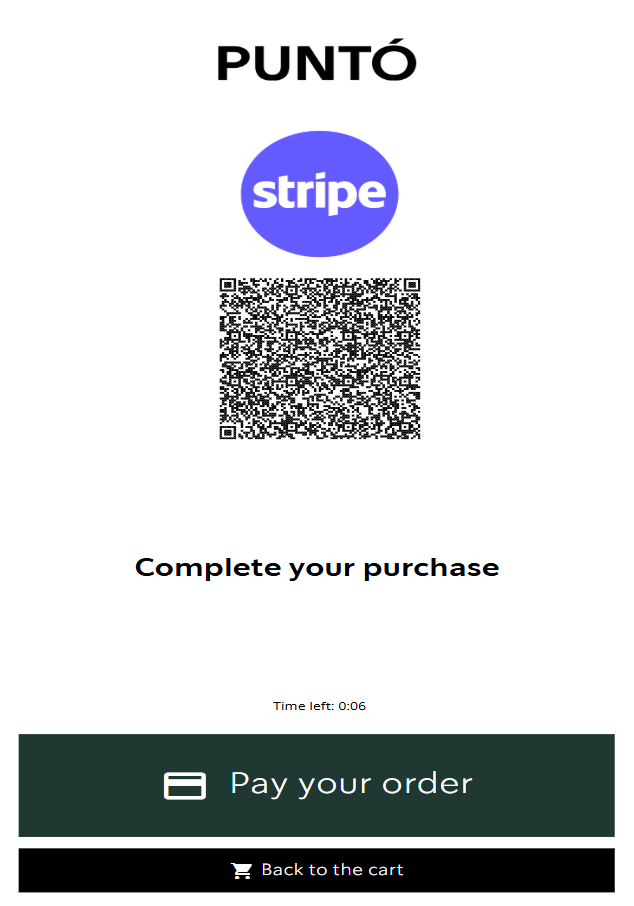
- The widget generates a QR code, which users can scan.
- Based on the selected payment method, the payment page appears on the user's mobile device, ready for processing.
After a Successful Payment:
- The widget sends a sensor event:
successReturnPage, true - You can configure this event to redirect users to a new page displaying a confirmation message, such as:
- "Thank you for your payment!"
- "Your order number is 251."
Handling Mock Data:
- After a successful payment, the widget clears the mock data.
- If the payment fails, the mock data remains unchanged.