Network Members
Network members are sub-customers that operate within your network structure.
- Think of them as separate units that manage their own content, users, and screens while you can access them from your main network account.
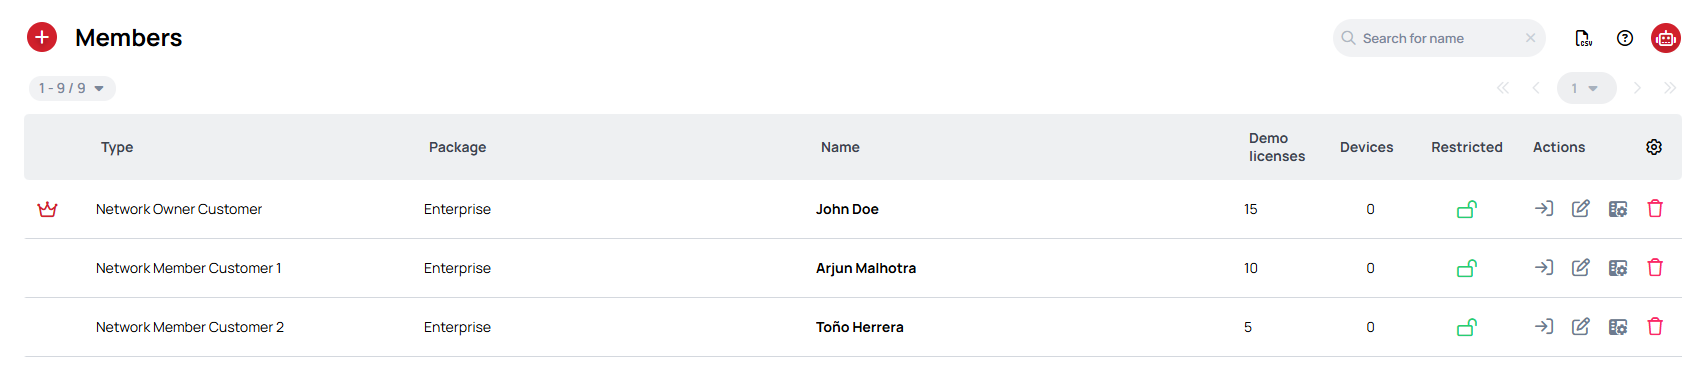
To access Network Members, navigate to Network > Members
Create Network Member
Network members represent different parts of your organization—whether they're franchise locations, departments, or client organizations.
Each member maintains their own independent workspace while benefiting from your network's centralized management.
Resources cannot be shared between members or between members and the owner workspace, as each functions as a separate, individual workspace.
If you need to share resources across locations, we recommend using our Teams feature.
- To create a new member, click the Add Member button located next to the Members header.
- This opens the member creation modal where you'll configure the new member account.
Setting Up Your New Member
The creation process requires some essential information and offers additional optional settings:
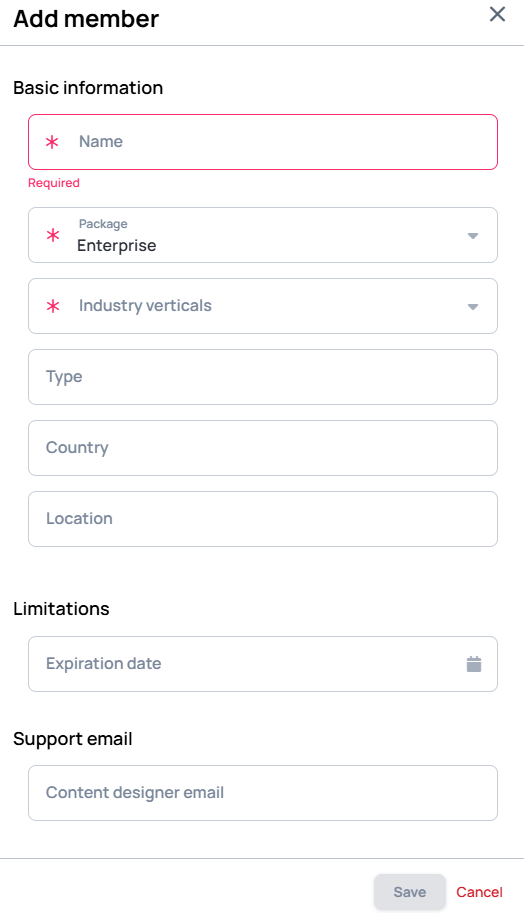
Required Information:
- Member Name - Choose a clear, unique identifier for this member. This name appears throughout the system, so make it easily recognizable.
- Package Type - Select from available packages (Enterprise, Professional, or Standard). Each package offers different features and capabilities tailored to various organizational needs.
- Demo Licenses - Allocate demo licenses for testing and evaluation. Consider the member's expected usage when determining this number.
Optional Configuration:
- Contact Information - Include email and phone details for the member's primary contact person to facilitate communication.
- Description - Add internal notes or context about this member to help your team understand their role or requirements.
- Initial User Setup - Create an administrator account during setup to give the member immediate access to their workspace.
After that, save the modal and the network member should appear in the list.
Available Member Actions
When working with individual members, you have several options:
- Go to Member - As a System Administrator, you can access any member's account to provide assistance or manage their settings
- Edit Member Details - Update member information and adjust their settings
- Edit UI Profile - Personalize how the interface looks for each member
- Remove - Permanently delete a member from your network when no longer needed
For assistance with member management, contact support@wallboard.info