Require a checkbox to be checked in order to activate a button
This article shows you how to create a button that is only active when at least one checkbox is checked. This functionality is usually important for forms that contain checkboxes.
Steps
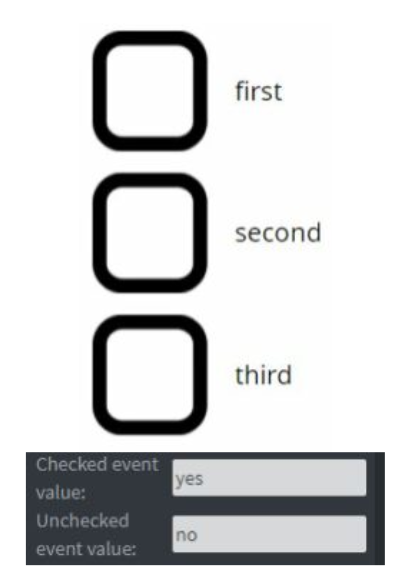
We have three checkboxes, with different event names. All their checked event value is set to “yes” and unchecked event value to “no”, but they could all be different from each other.

We have two more text widgets to represent the next step buttons. Normally, they would be at the same position, but for this tutorial, they will be next to each other for easier visibility.
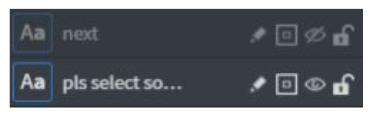
The next button starts out hidden, the other one starts visible. You could also handle this in a Page change event (Page wide, Page start type), if needed.
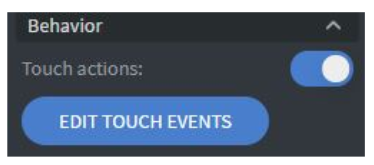
We will start with the Touch events for the first Checkbox.
Make sure simplified view is turned OFF in the events dialog
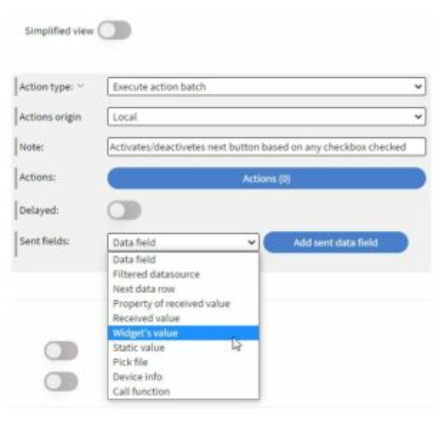
We need to add an “Execute action batch” type action. Note can be set, but not required. Next, add 3 “Widget’s value” type Sent fields.
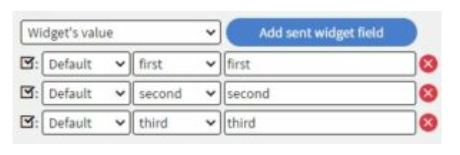
Select our three Checkboxes.

Open the actions inside this Execute action batch.
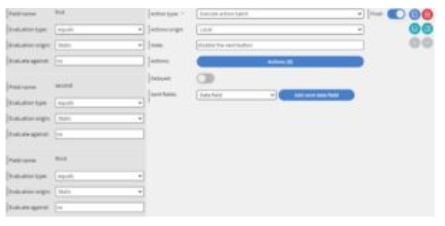
Inside the batch, we will add two actions. The first one will have a condition for each Checkbox. All these conditions have an ”AND” relationship to each other, so we need to check if each checkbox is OFF (“equals“ “static“ “no“), and, in this case, deactivate the next button. This action has to be FINAL. It means, that if this action ends up executed, anything below it will be ignored.
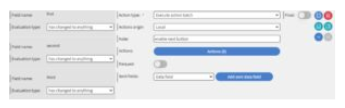
The second action will not have any conditions. Due to the first one being final, it will be executed when one or more Checkbox is checked.
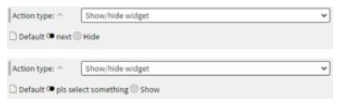
Now we can set up the enable/disable next button logic however we want. Click the “Actions (0)” button for each of these Action batches. For this tutorial, we just used two Show/hide widget action for each batch. (The “Close all action properties” option had been used to make this look more compact on the screenshot.)
At this point, we should check if it works. It will only work, when we click on the first checkbox, so the cases to test are these:
- Open preview => Next is disabled
- Click on the first checkbox => Next button enabled
- Click on it again => Next button disabled
- Click on the second checkbox => Nothing changes
- Click on the first checkbox => Next button enabled
- Click on the first checkbox again => Next button stays enabled (due to the second one being checked)
Please make sure that it works so far before moving on to the next step!
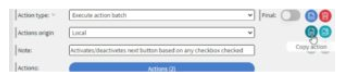
Now we need this logic to work for all Checkboxes. Go back to the Touch events of the first Checkbox and click on Copy action for the first Execute action batch we made.
![]()
Go to the Touch events of the second and third checkbox and click the “Paste all” button. Now you can test the whole thing and it should work.
You could use a “Content wide” Execute action batch instead of copying it for each checkbox. In that case if you even need to modify the logic you don’t have to edit it for each checkbox, only once for the content wide batch!
If you have further questions please do not hesitate to contact us at support@wallboard.info. Happy editing!
