O365 shared calendar room
First create the room resource itself inthe Exchange admin center of your O365 tenant.
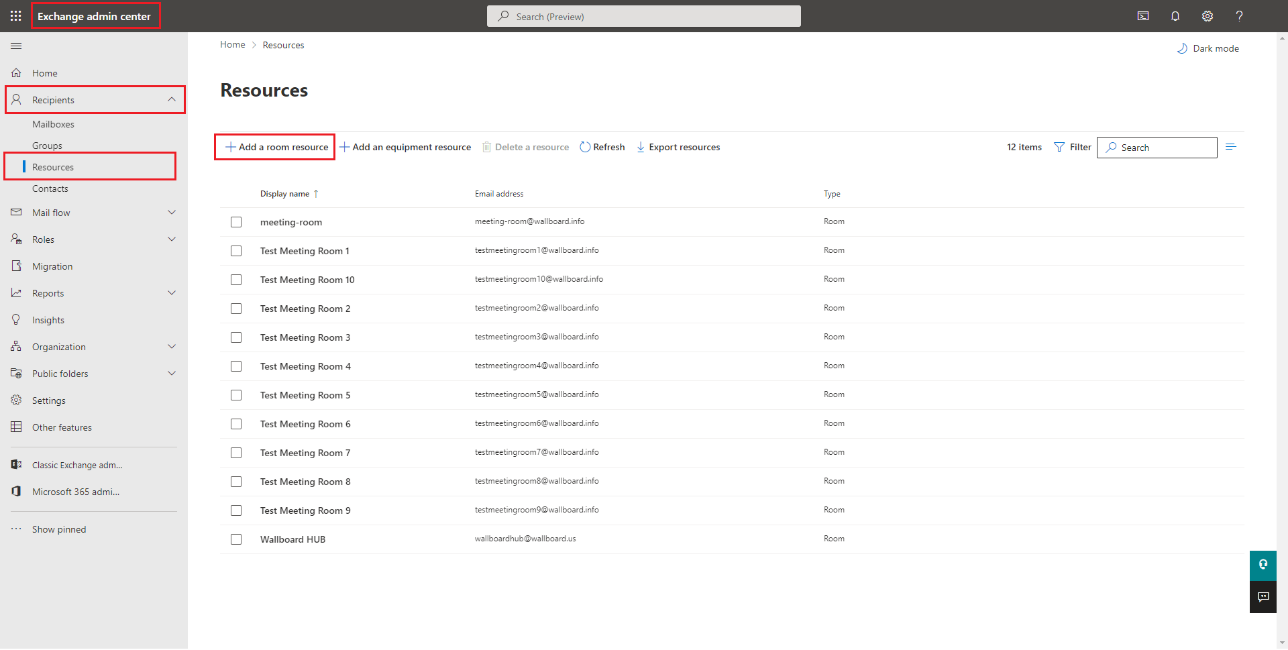
Follow the creation steps in the wizard and create the room resource with its own mailbox.
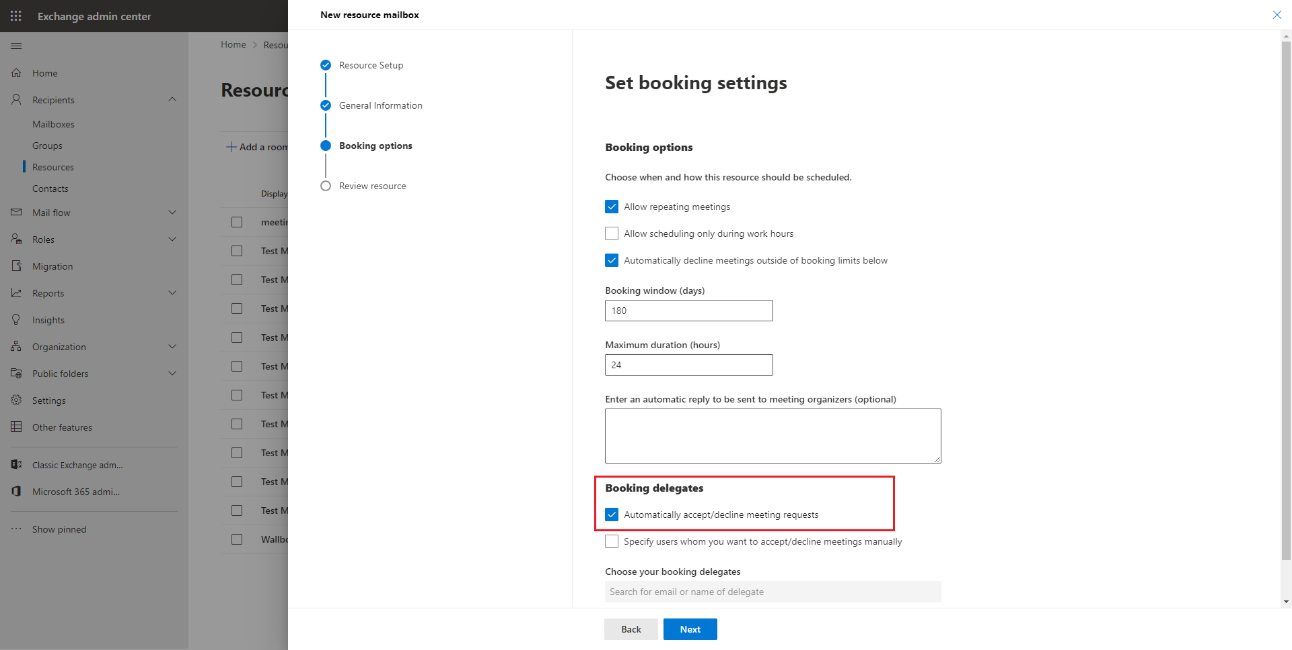
Make sure you allow the resource to accept and decline meeting requests in the `Booking delegates= options block.
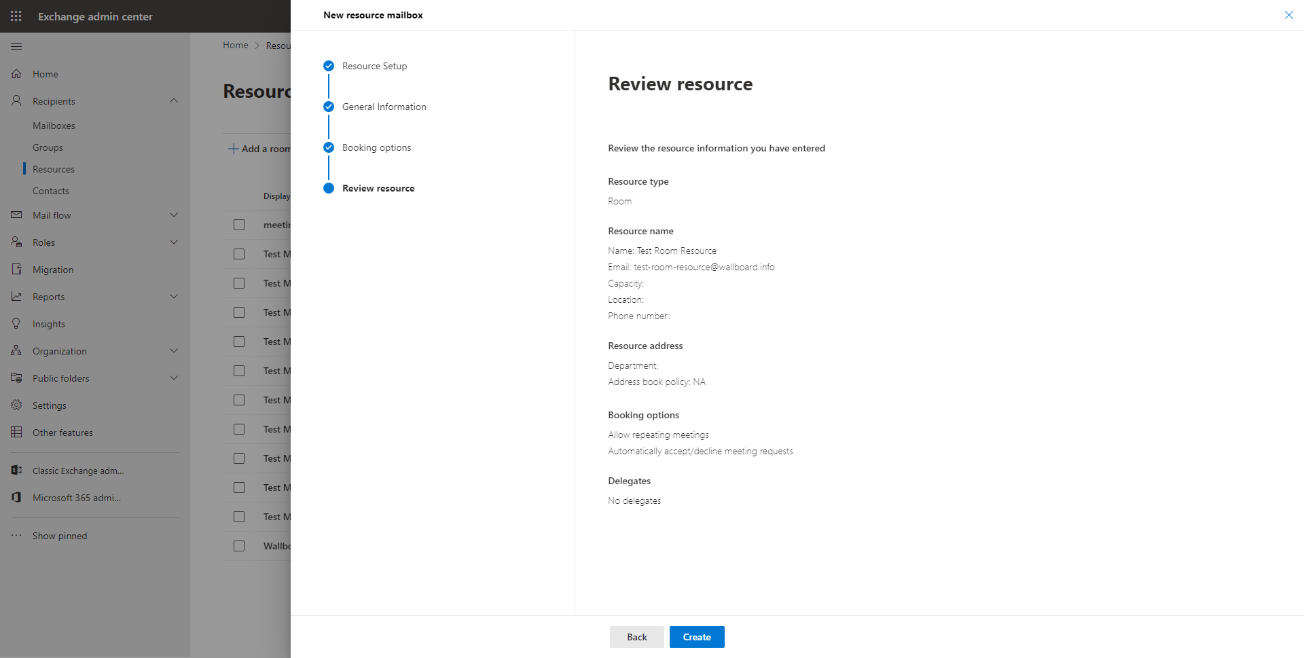
Review the resource details and create it.
After the resource is created you can add permissions to users within your tenant to manage it.
Add the Send on behalf permission to the user which you will use to authenticate in the Wallboard system.

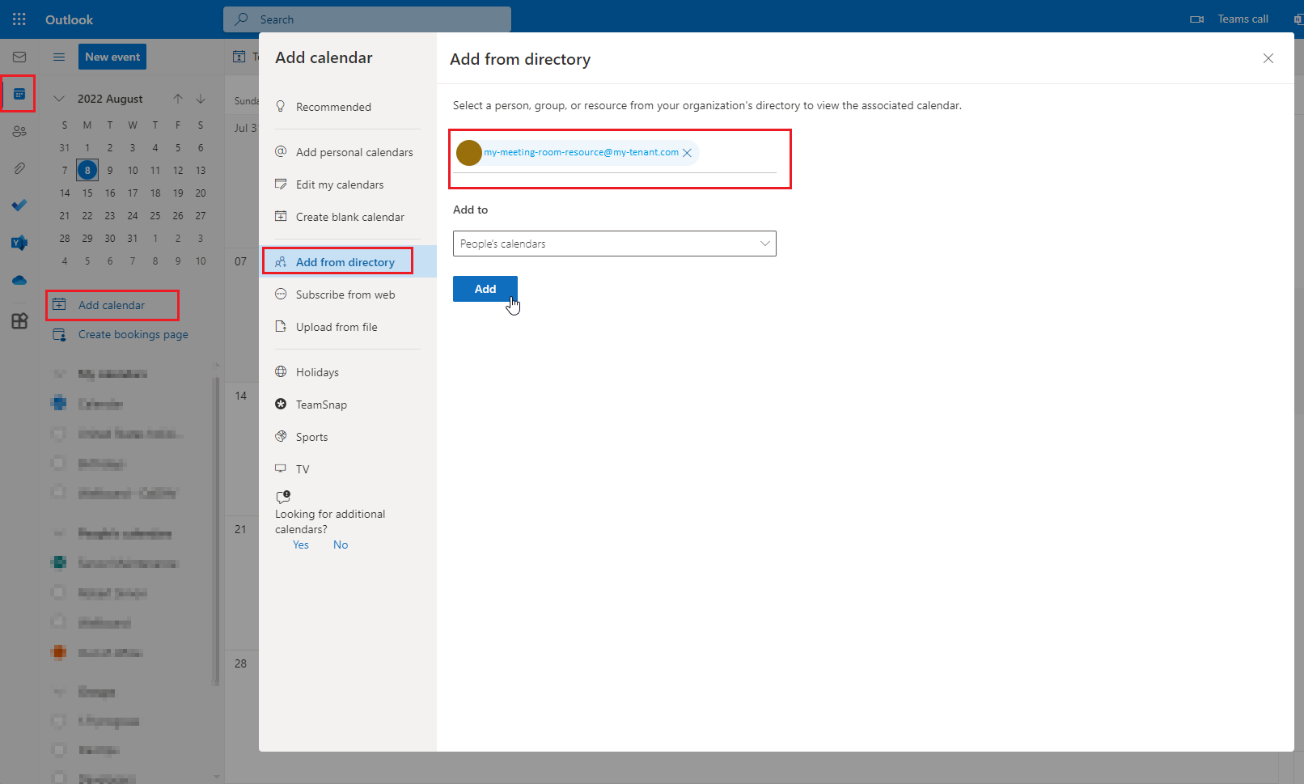
Next you need to open your online O365 Outlook portal and login with the user that you will use to authenticate in the Wallboard system.
In the calendar view you will have the ability to add the previously created room resource as a shared calendar under your account.
You will need to use the calendar resource's email address.
The rest of the setup process is exactly the same as connecting any other calendar to your Wallboard environment.