O365 shared calendar room
O365 shared calendar room datasources allow you to connect Microsoft Office 365 room resources to your Wallboard system, enabling real-time display of meeting room availability, bookings, and scheduling information.
- This integration provides seamless access to room calendar data for occupancy displays, scheduling dashboards, and facility management widgets.
Prerequisites
Before creating an O365 shared calendar room datasource, ensure you have:
- Microsoft Office 365 tenant with Exchange Online
- Exchange administrator privileges to create room resources
- Office 365 user account with appropriate permissions
- Understanding of your room booking and calendar requirements
- Administrative access to configure Microsoft credentials in Wallboard
- Network connectivity to Microsoft's APIs
- "Send on behalf" permissions for the authenticating user account
Supported O365 Calendar Features
The O365 shared calendar room datasource supports:
Calendar Data Types:
- Meeting room availability and booking status
- Event titles, organizers, and attendee information
- Meeting start and end times with time zone handling
- Recurring meeting patterns and exceptions
- Room resource properties and settings
Room Resource Features:
- Automatic meeting acceptance and decline
- Booking delegate configuration
- Room capacity and equipment information
- Custom room properties and metadata
Limitations:
- Requires proper Exchange delegation permissions
- Limited to room resources with shared calendar access
- Private meetings may have restricted information display
- Complex recurring patterns may show simplified data
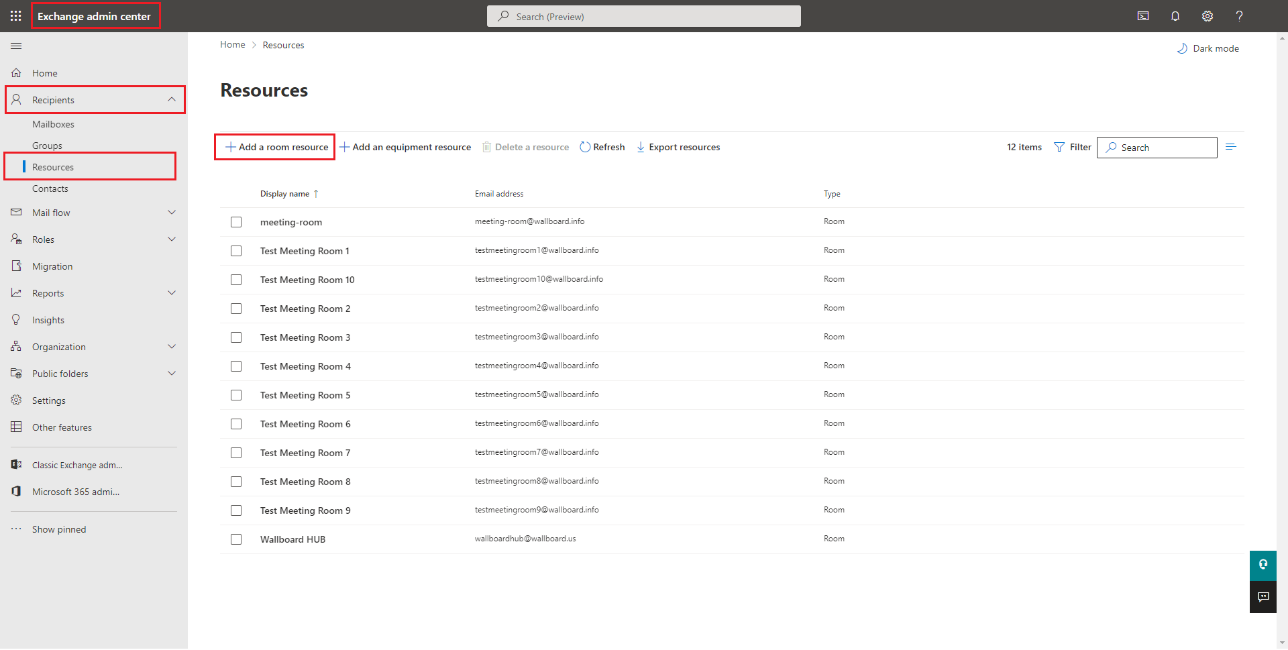
Create the resource
- First create the room resource itself in the Exchange admin center of your O365 tenant.
Follow the creation steps in the wizard and create the room resource with its own mailbox.
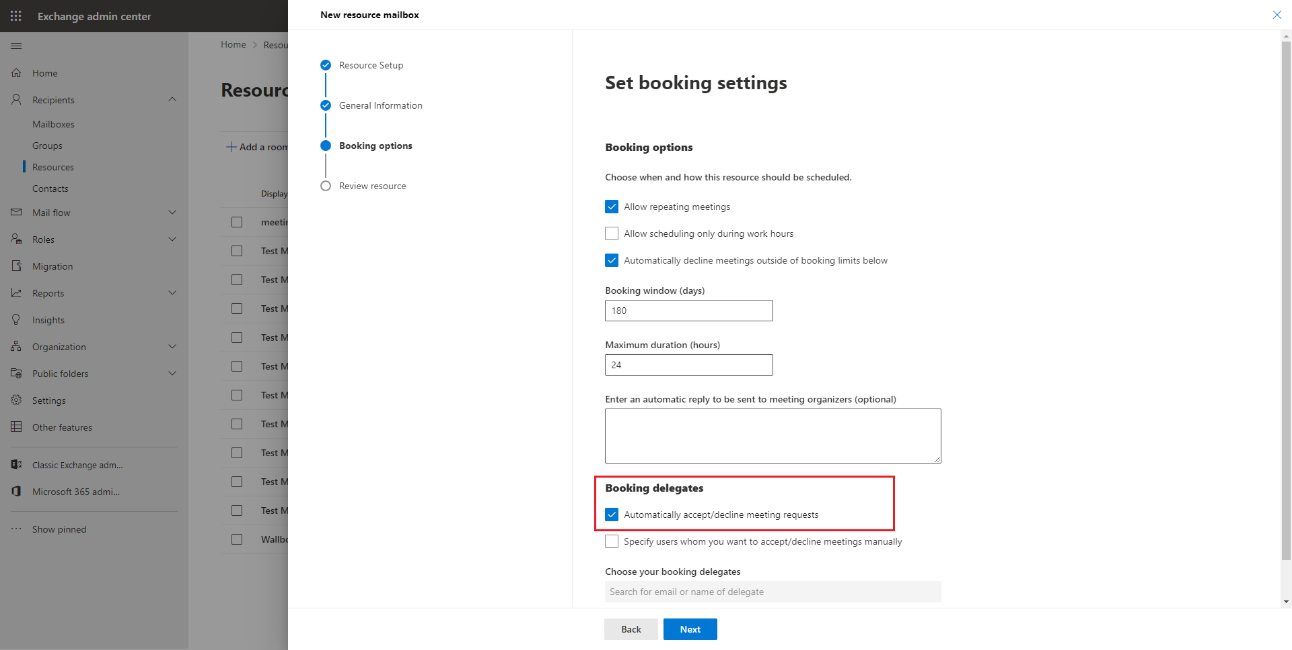
- Make sure you allow the resource to accept and decline meeting requests in the `Booking delegates= options block.
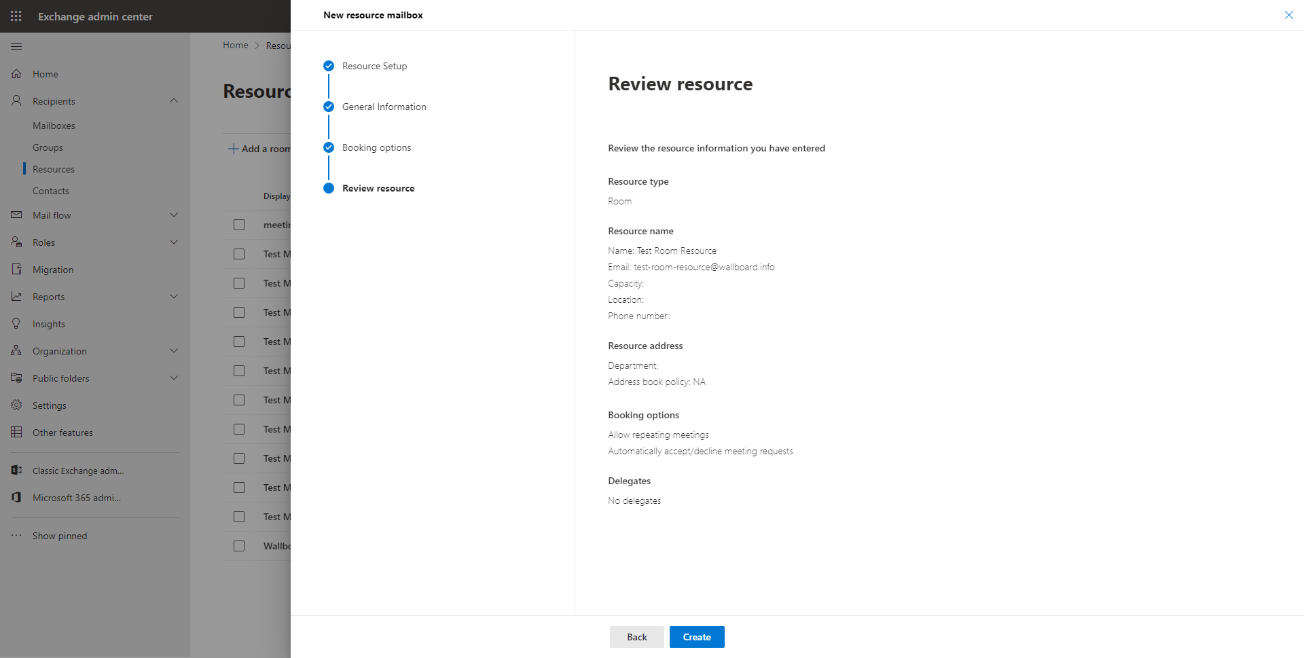
Review the resource details and create it
Add permissions
After the resource is created you can add permissions to users within your tenant to manage it.
- Add the
Send on behalfpermission to the user which you will use to authenticate in the Wallboard system.

Login to O365 portal
-
Next you need to open your online O365 Outlook portal and login with the user that you will use to authenticate in the Wallboard system.
-
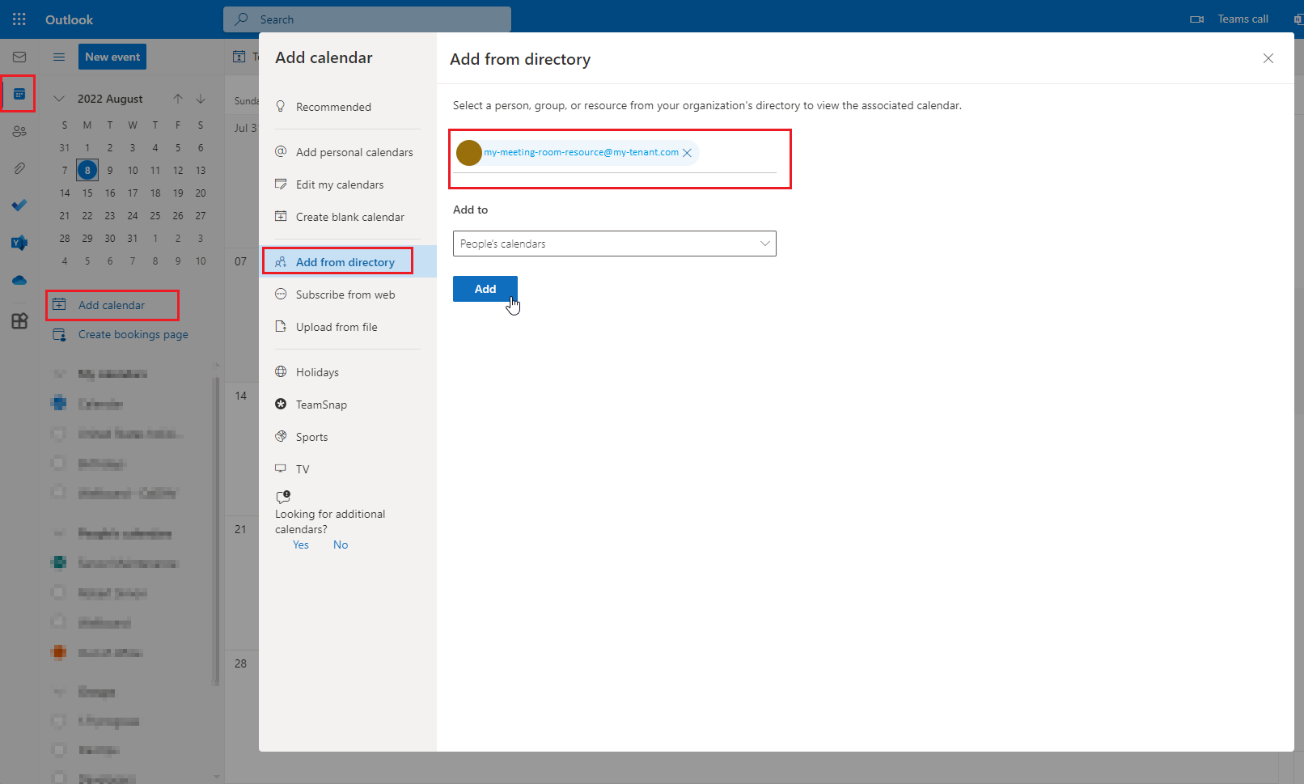
In the calendar view you will have the ability to add the previously created room resource as a shared calendar under your account.
You will need to use the calendar resource's email address.
To create an O365 shared calendar room datasource, you need to configure Microsoft credentials in the Wallboard system.
Creating Microsoft Credentials
1. Navigate to Credentials
Go to Settings > Cloud Integration > Microsoft credentials
2. Add New Credential
Click Add new and select the Calendar scope from the dropdown
3. Team Assignment (Optional)
You can assign the credential to specific teams if your organization requires access control
4. Authentication Process
After filling the required fields:
- Click the
Sign in with Microsoftbutton - Complete the Microsoft OAuth authentication flow
- Grant the necessary permissions for calendar access
- Verify the authentication was successful
The Wallboard system requires calendar access permissions. During authentication, you'll be prompted to grant:
- View your calendars and shared calendars
- Read calendar event details and availability
- Access to Exchange room resources (with proper delegation)
Once authenticated, you can create external datasources using the acquired Office 365 calendar access.
Create Datasource
Go to Datasources > Click Add new in the External datasource tab > Choose the Calendar type.
Basic Configuration
Credential Selection
Select the Microsoft credential you created previously from the dropdown.
Select "User Principal Calendar"
- Enter the room's email address (e.g., conference-room-a@yourcompany.com)
Update Schedule
Decide how your datasource updates from the Office 365 calendar:
- Select a
Refresh Frequencyfor regular intervals (every minute, 15 minutes, hour, etc.) - Specify a
Cron Expressionfor custom scheduling
0 */5 * * * *- Every 5 minutes (recommended for room displays)0 */15 * * * *- Every 15 minutes0 0 */1 * * *- Every hour
Save Configuration
Once all settings are configured according to your room calendar requirements, click Save to create the datasource.
After saving, the system will attempt to fetch data from your O365 room calendar. Check the datasource status to confirm successful connection and data retrieval.