How to collect data into an internal datasource via Webhook
Preparation
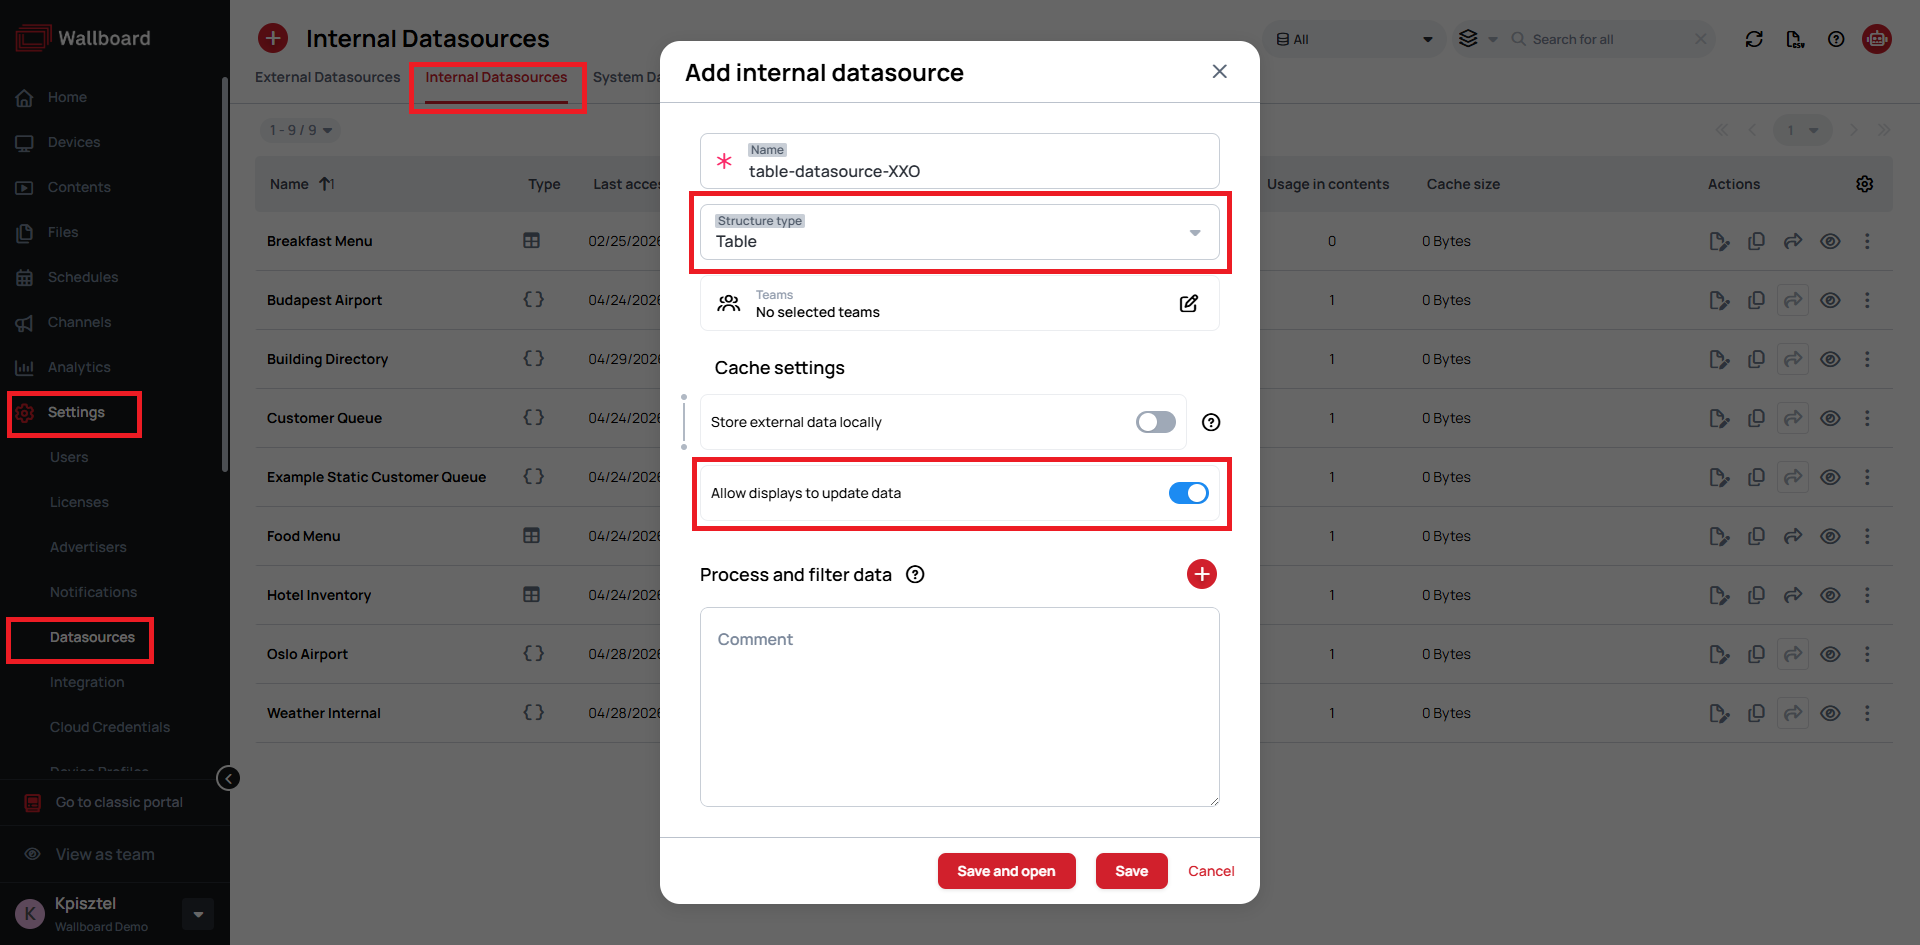
Create an internal datasource
- Go to Settings > Datasources > Internal Datasources and click Add internal datasource
- Name your datasource and select Table type
- Click Save
- Set up your data fields

tip
For easier set-up you can copy the following JSON structure and paste it with Import from JSON functionality
{
    "table-datasource-XXO": {
        "header": {
            "Name": "string",
            "Email": "string",
            "ID": "string",
            "Language": "string",
            "Timestamp": "string"
        },
        "rows": [
            {
                "Name": "",
                "Email": "",
                "ID": "",
                "Language": "",
                "Timestamp": ""
            }
        ],
        "connectors": {}
    }
}
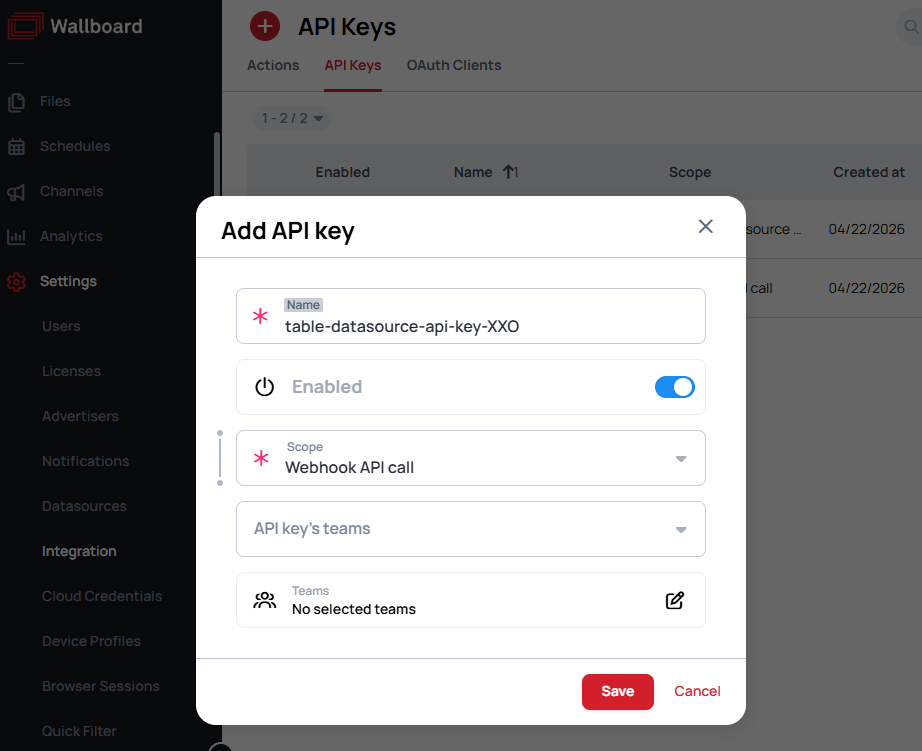
Create a Webhook API key
- Go to Settings > Integration > API keys and click Add new
- Name your API key
- Select Webhook API call scope and click Save
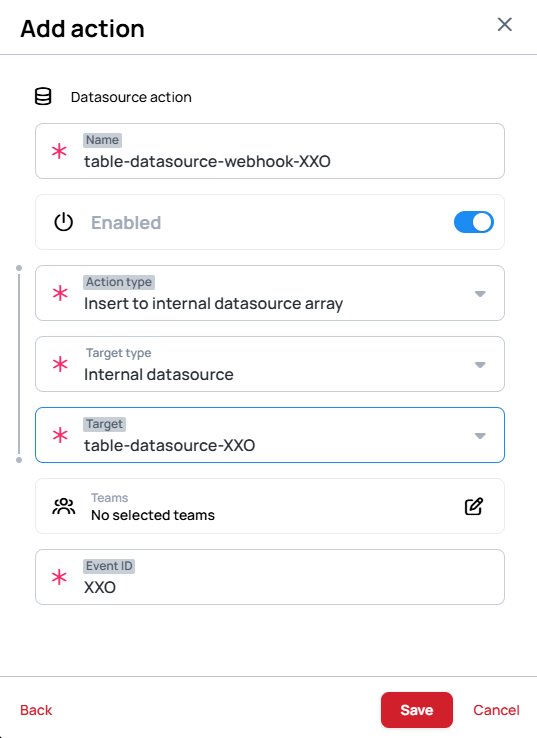
Create a webhook action
- Add a new action and select Datasource action type
- Set the Action type to Insert to internal datasource array
- Set the Target to your created datasource

Configure the content
Downloadable Content
Content for datasource modification via webhook
form-data-webhook.zip
Please enable Import as Content in the import modal!
- Select your content and click OK
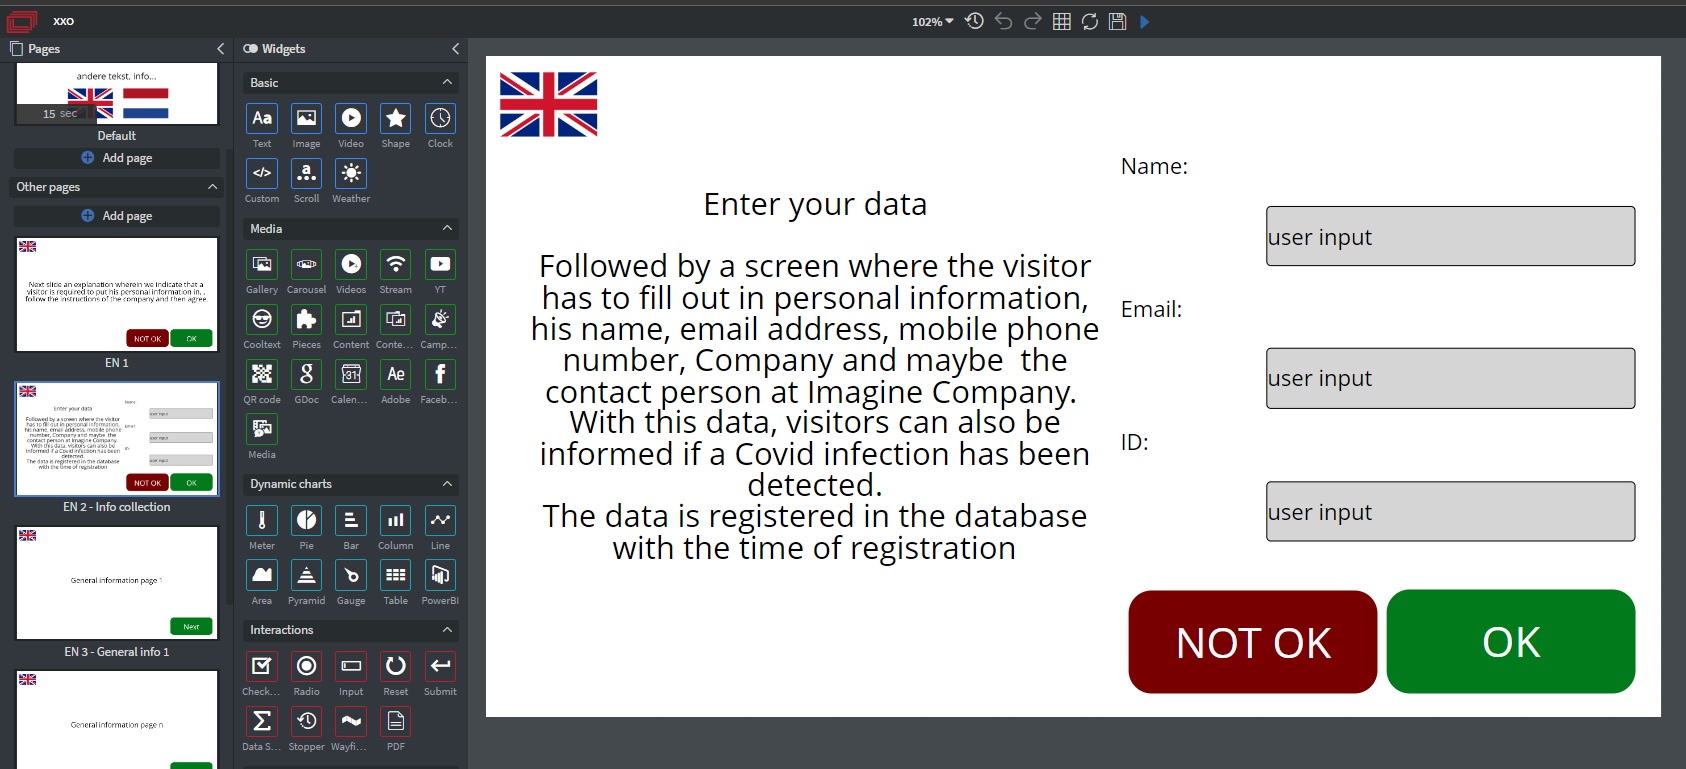
- Select the widget, go to the Other tab and click Edit touch events

- Add a new action, set the Action type to Execute action batch and add Sent fields using the Widget's value type
- Choose the fields you want to collect
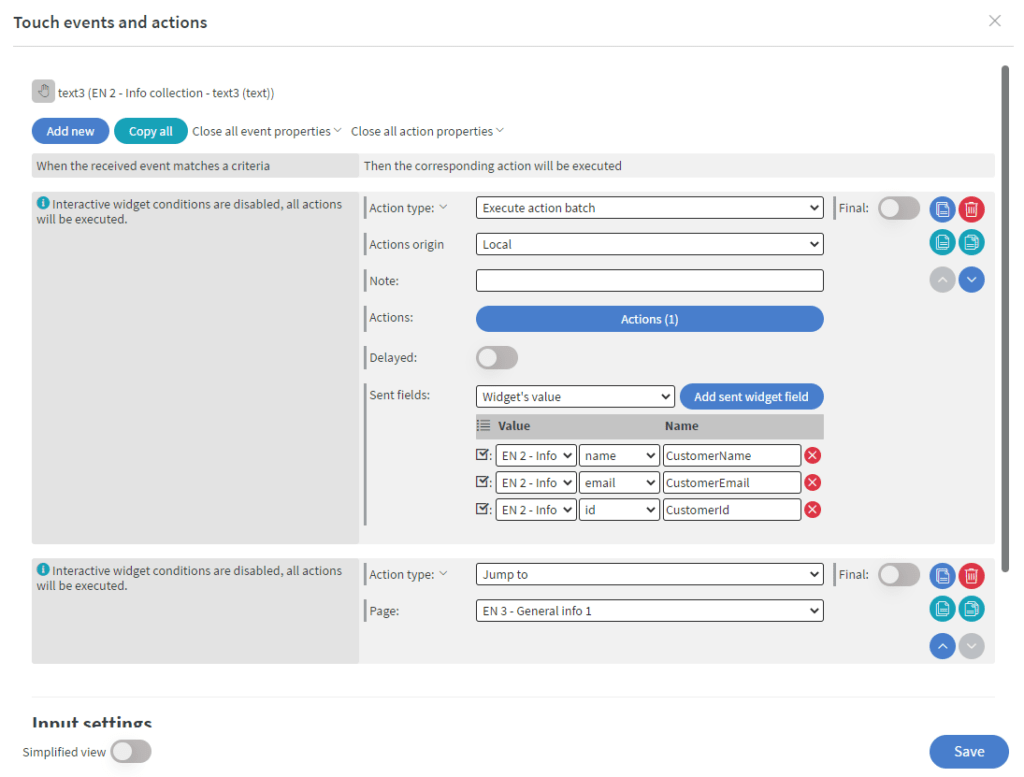
Configure the touch action
- Click on the Actions button to enter the Action batch
- Add a new action, set the Action type to Execute action batch and add Sent fields using the Call function type
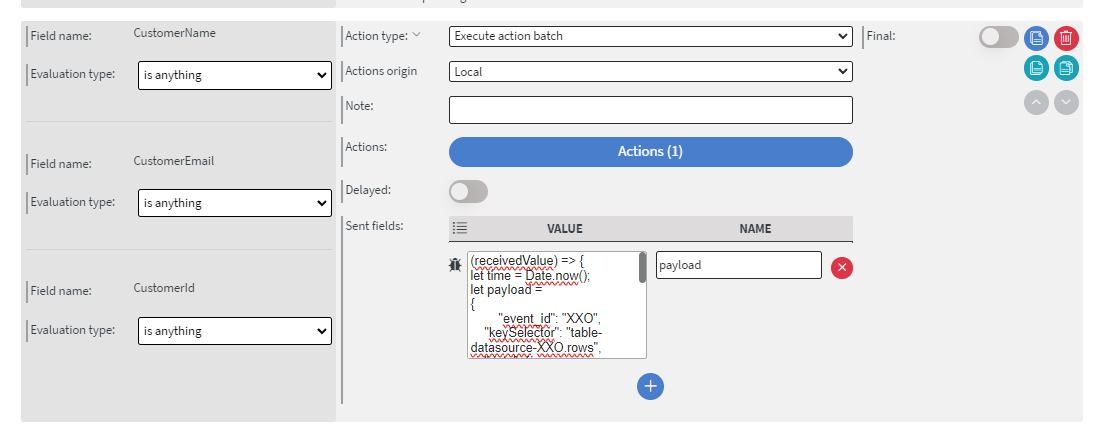
- Use the following script to build your webhook payload:
(receivedValue) => {
let time = Date.now();
let payload =
{
	"event_id": "XXO",
    "keySelector": "table-datasource-XXO.rows",
    "data": {
                "Name": receivedValue.CustomerName,
                "Email": receivedValue.CustomerEmail,
                "ID": receivedValue.CustomerId,
                "Language": "NL",
                "Timestamp": time
			},
	"index": 0
};
return btoa(JSON.stringify(payload));
}
WATCH OUT FOR THIS
Make sure your keySelector contains your internal datasource table name like below:
"keySelector": "YOURTABLENAME.rows" -> in our case it is -> "keySelector": "table-datasource-XXO.rows",
Make sure you use your TABLE fields names
"YOUR_TABLE_FIELD_NAME": receivedValue.CustomerName, -> in our case it is -> "Name": receivedValue.CustomerName,
"YOUR_TABLE_FIELD_NAME": receivedValue.CustomerName, -> in our case it is -> "Email": receivedValue.CustomerEmail,
"YOUR_TABLE_FIELD_NAME": receivedValue.CustomerName, -> in our case it is -> "ID": receivedValue.CustomerId,
Call the webhook
- Click on the Actions button to enter the Action batch again
- Add a Call API action with the following URL
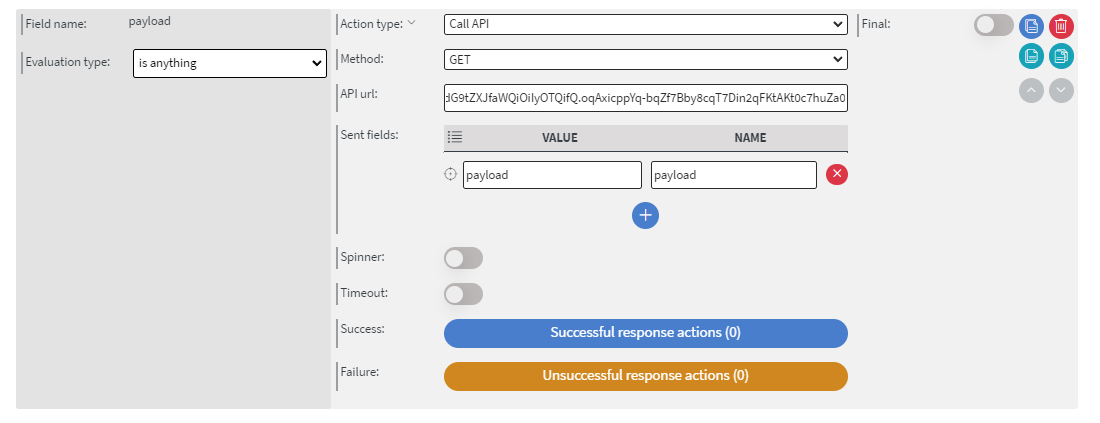
API URL
https://YOURSERVER/public-api/integration/webhooks?apiKey=YOURAPIKEY&payload={payload}
Tip!
If you have further questions please do not hesitate to contact us at [email protected]. Happy editing!