Create User Authentication with PIN code protection
This feature works in server version 1.9.119 and after!
Presentation of the Content concept
If you wish to restrict visibility of certain pages, you can do so. This article will guide you through creating an Authentication within your Content using a PIN code protection setup.
Setting up the Pin Code
Navigate to your Settings > Users.
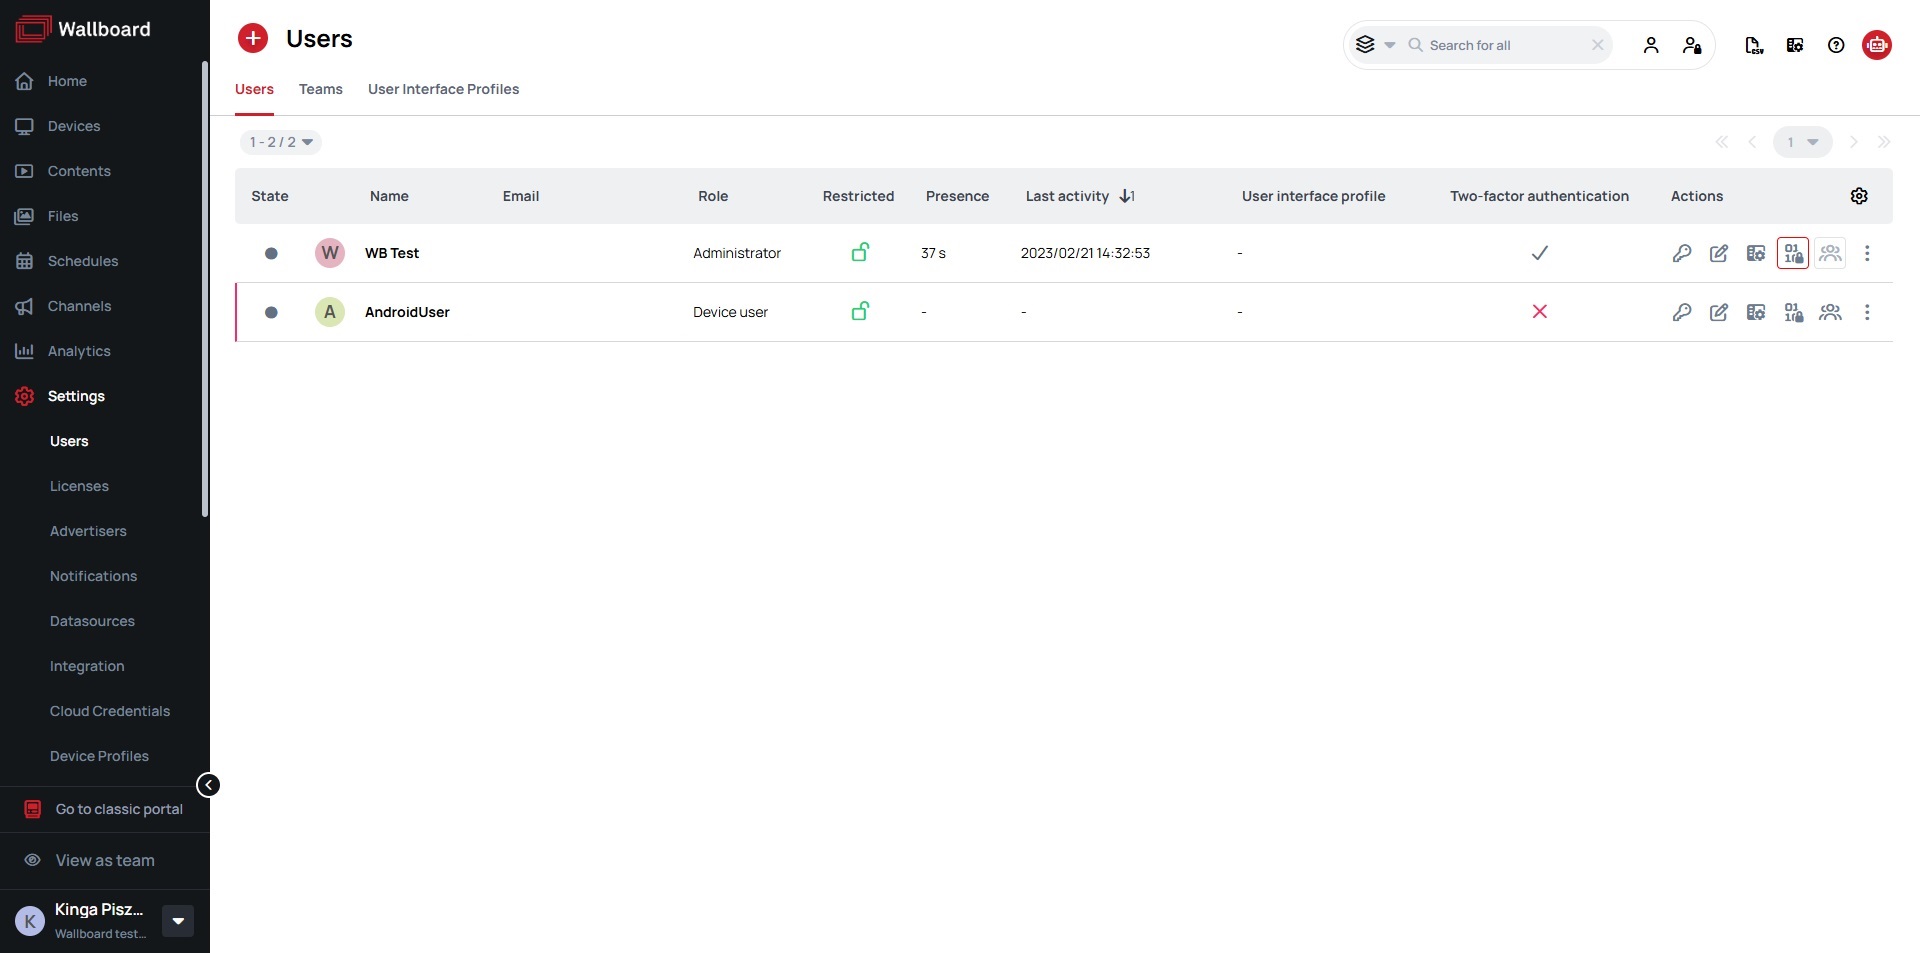
Select the User for whom you wish to add a PIN code, and then click on the Set PIN Code icon.
If you can not see the Set PIN Code icon click on the cog icon in the table header and check the Set PIN code option.
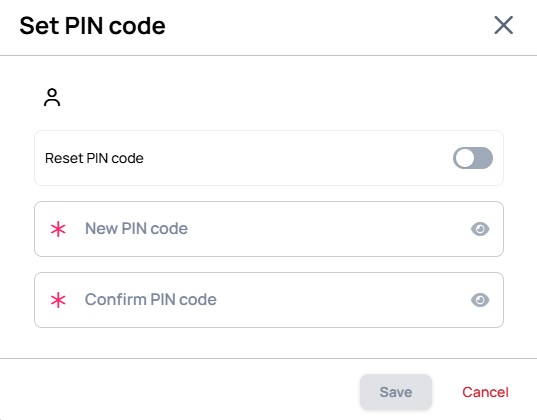
In the popup menu, add a PIN code to your user and click on the "Save" button.
Setting up Authentication in your Content
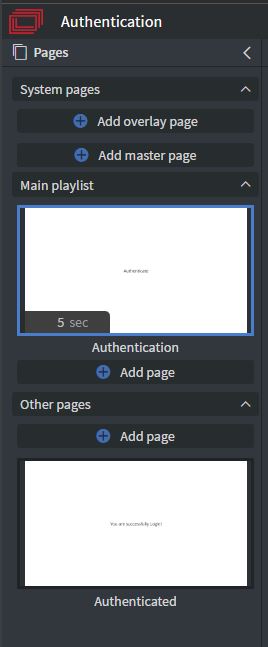
Navigate to your Content and open it. Create a new page that will serve as our Authenticated page, where users will be directed upon successful authentication. Ensure that this page is placed in the "Other pages" section, as we do not want it to be accessible by the default playlist.
Create mock datasource
We need to create a mock datasource to assist us at tracking authentications within the content. This will help us to monitor and manage user access, identifying who is Authenticate themselves to see the hidden pages in the content. When authentication is successful, users will be directed to the site; otherwise, they will not able to see the page.
Navigate to the right side menu > Content > Data binding > Base data path and click on the base data path icon
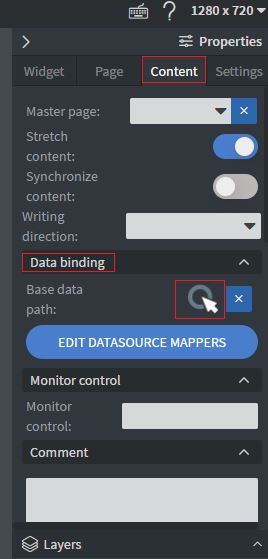
Click on the "Edit mock datasources" button.

Create a new Datasource and give it a name (Optional). Turn on the "Show this default value on devices" option. In the Data (json), copy the following code:
{"isautchenticated":"false"}
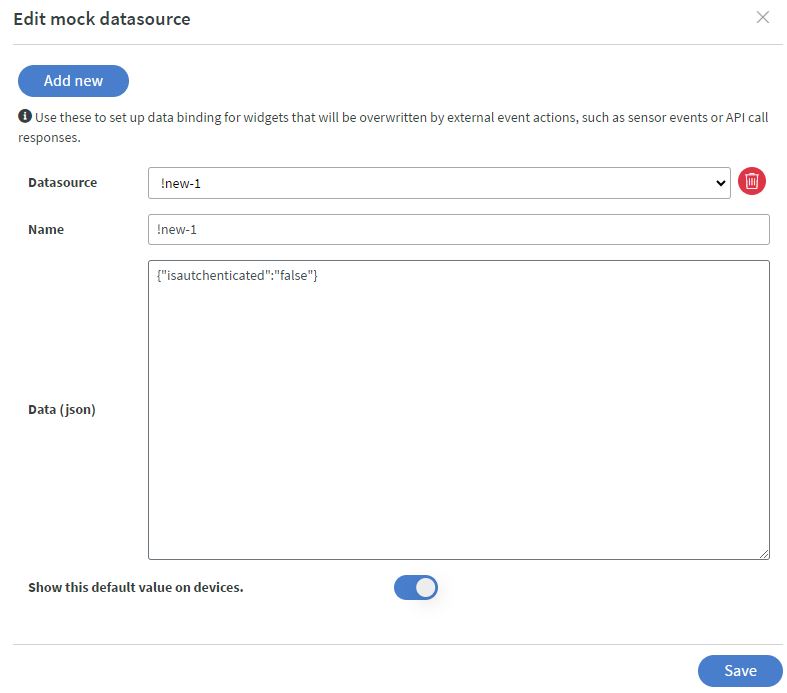
Click on the save icon to save your changes.
Creating the Authenticator
Add a text or image widget. This will serve as our clickable widget for authentication purposes. Click on the widget, then navigate to the right side menu and select Widget > Other > Click type: "Action" > Edit touch events.
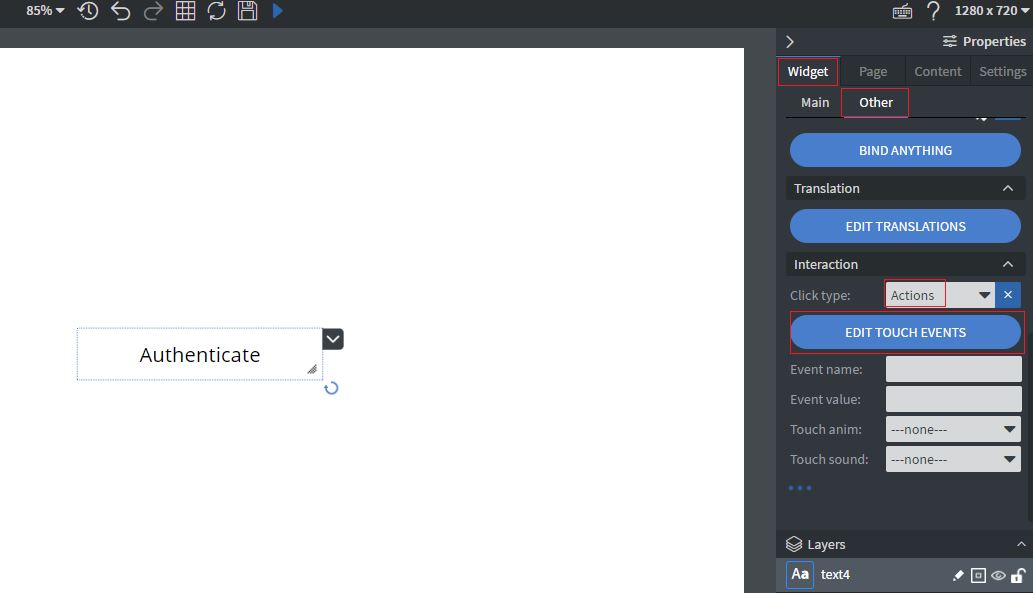
In the "Touch events and actions" popup, click on the "Add new" button.

First, select "Action type:" as "Jump to" and choose the page where you wish to navigate after authentication. In our example, the page name is "Authenticated".

In the "Touch events and actions" panel, swtich on the "Requires pin code authorization" button under Security. Then, at the "Pin code success", click on "Response actions".
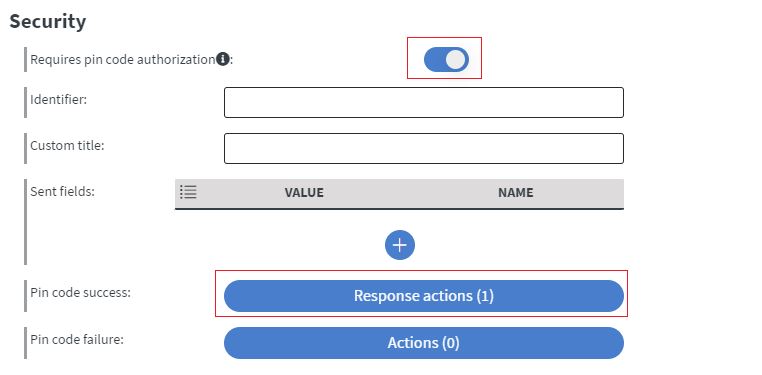
In the new popup "Api response events and actions" click on the "Add new" button.

Change the "Action type" to "Change datasource". Under "Datasource", select your mock datasource located under Content Wide.
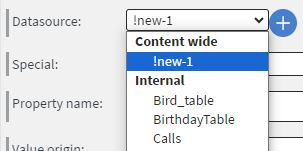
At the "Special" menu point, select "overwrite property". For "Property name", use the variable we set up earlier, which is "isauthenticated". Set the "Value origin" to "Static value", and the "Value" to true.

After configuring the Response Action, click on "Save" button to save it. Then, click on the save icon again to save our Touch Events.
Creating the Authenticator changer
This setup ensures that if the page is accessed on the device without proper authentication (such as accidentally opening this page), it will revert to the default or authentication-required page.
Navigate to the right side menu and select Content > External events > Edit datasource events.
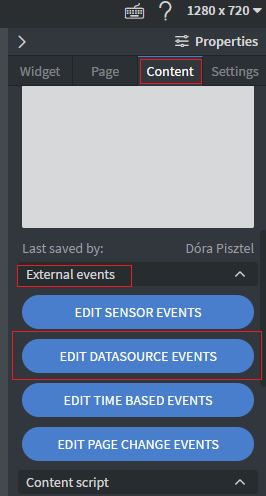
In the "Datasource events and actions" in the "content wide events" submenu click on the "Add new" button.

To the "Bound value" select our Mock datasource and click on save.

In the "Evaluation type" section, select "equals". For "Evaluation origin", choose "Static", and for "Evaluate against", select "false". Then, at "Action type", select "Jump to" and choose the page where the content should redirect. In our example, this page is called "Authentication".

Click on the button to save our Datasource events. After this, click on the Content save icon to save our progress. With this last step, we have completed our Authentication content.
Downloadable Content
NOTE: Please enable Import as Content in the import modal!
If you have any question about it, please contact us in the support@wallboard.info. Happy Content creation for all of you!